
We have spent much of the last year at GoGeomatics discussing data sovereignty and its impact on our professional and personal lives. Modelled after the idea of national sovereignty, data sovereignty dictates that ownership and control of Canadian’s data should fall under the jurisdiction of Canadian governments and the citizens they represent. A major concern of data sovereignty relates to the location of physical data infrastructure – in other words, where is data located and under which country’s laws is it governed.
In a time when Canada’s economy and national sovereignty feel threatened, many Canadians have been embodying the mantras of “Elbows Up” and “Buy Canadian”, deliberately avoiding purchasing American products or traveling to the United States. It was in this context that I had the opportunity to meet with the team at K2 Geospatial, a geospatial solutions company based in Montreal.
K2 Geospatial has recently released JMap Cloud, a geospatial cloud platform built upon the success of their previous JMap line of products. K2 Geospatial works alongside French cloud computing company OHV to host data and perform geoprocessing through exclusively Canadian data centres. Due to this arrangement, JMap Cloud is entirely independent of American data service providers.
To help better understand JMap Cloud, K2 Geospatial kindly provided a licence for access to their platform, allowing me to test the features of JMap Cloud and share my experience with the Canadian geospatial community. Here is what I found.
Getting Started
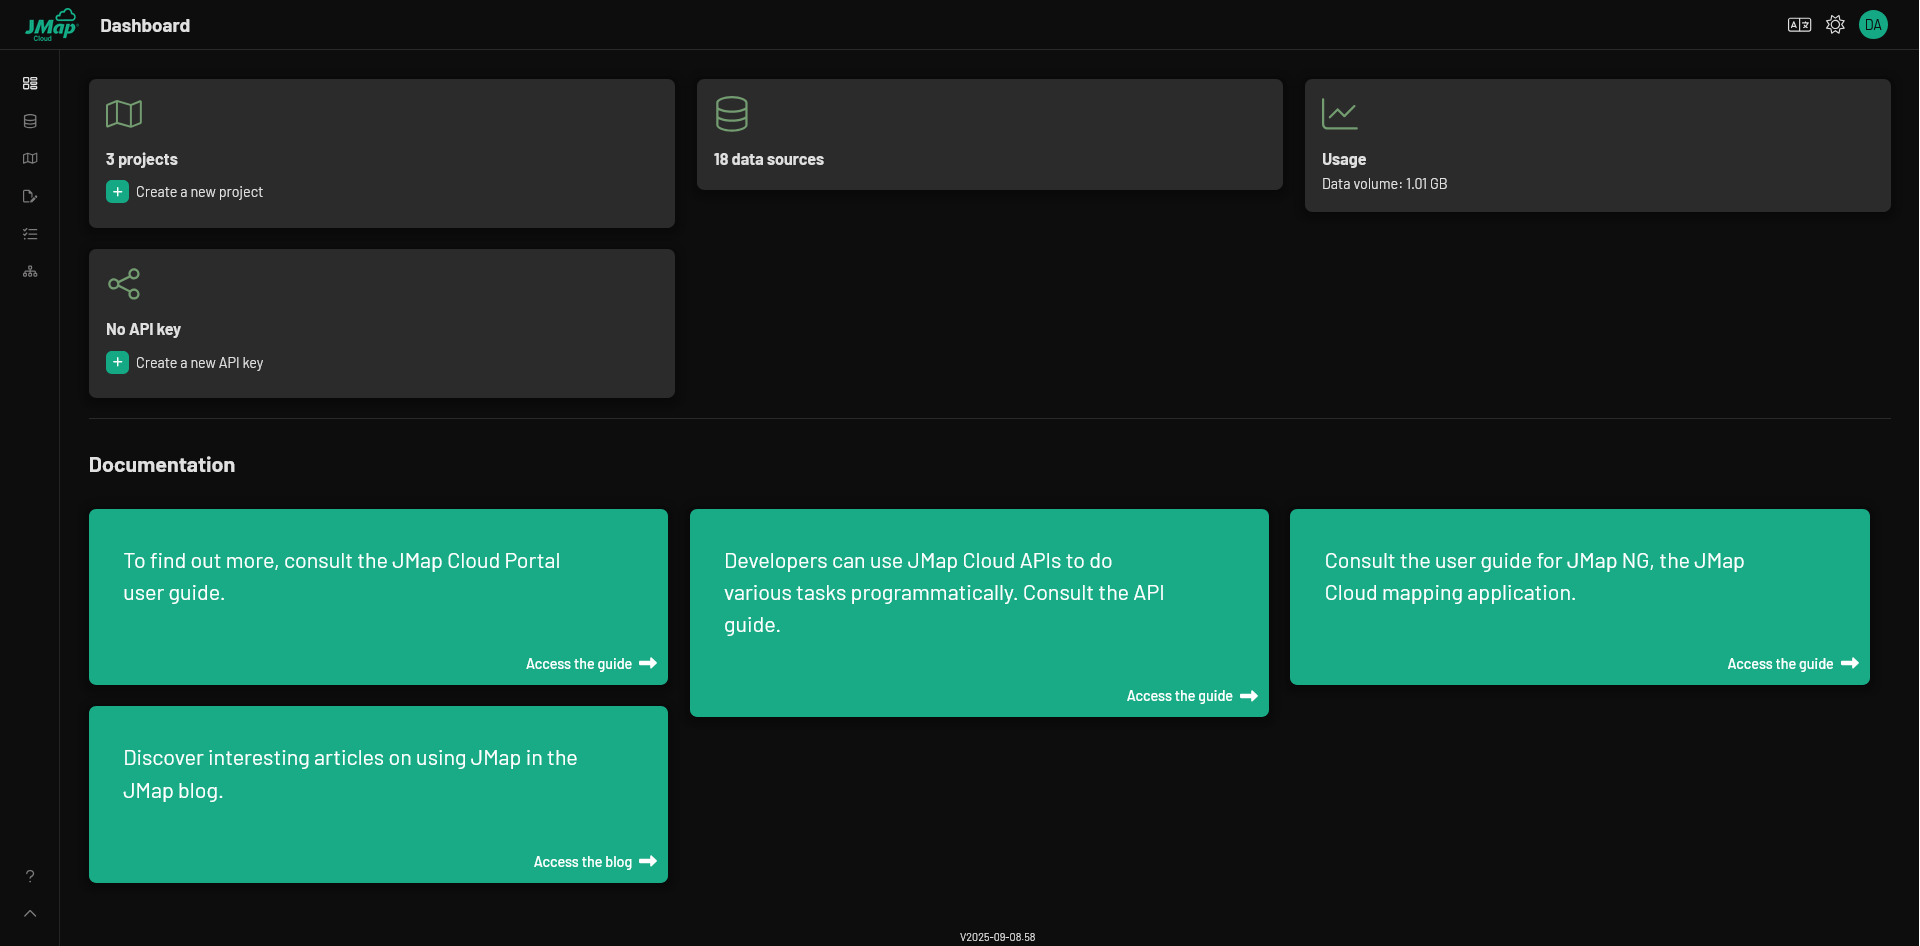
Accessing JMap Cloud is relatively easy. Once a user has an account, they can access the platform via the JMap Cloud Portal. After signing into the portal, users will be prompted to select an organization. JMap Cloud allows users to be part of many different organizations, each with its own data sources, projects and permission structure. After selecting an organization, users will be taken to a dashboard, which contains links to projects, datasets, API keys and documentation. The dashboard can be customized allowing users to set English, French or Spanish as their default language, as well as activate/deactivate dark mode. On the side of the screen is a tool bar, which will take users to different sections of the platform.
Navigating to the Organization section, users will find information about administrative and organizational topics. Depending on assigned privileges, users can manage members and groups, create API keys, activate extensions and change the name of their organization. There are three levels of organizational roles within JMap Cloud – Administrator, Editor and Viewer – each with its own set of privileges. Viewer is the most basic role, allowing users to view projects and edit layers in which they have been assigned the necessary permissions. Editor is the mid-tier role, granting all of the privileges of Viewer, along with the ability to create data sources, edit projects and manage some permissions. Administrator is the highest role, granting all of the privileges of Editor, along with the ability to manage API keys, memberships and the entire set of permissions.
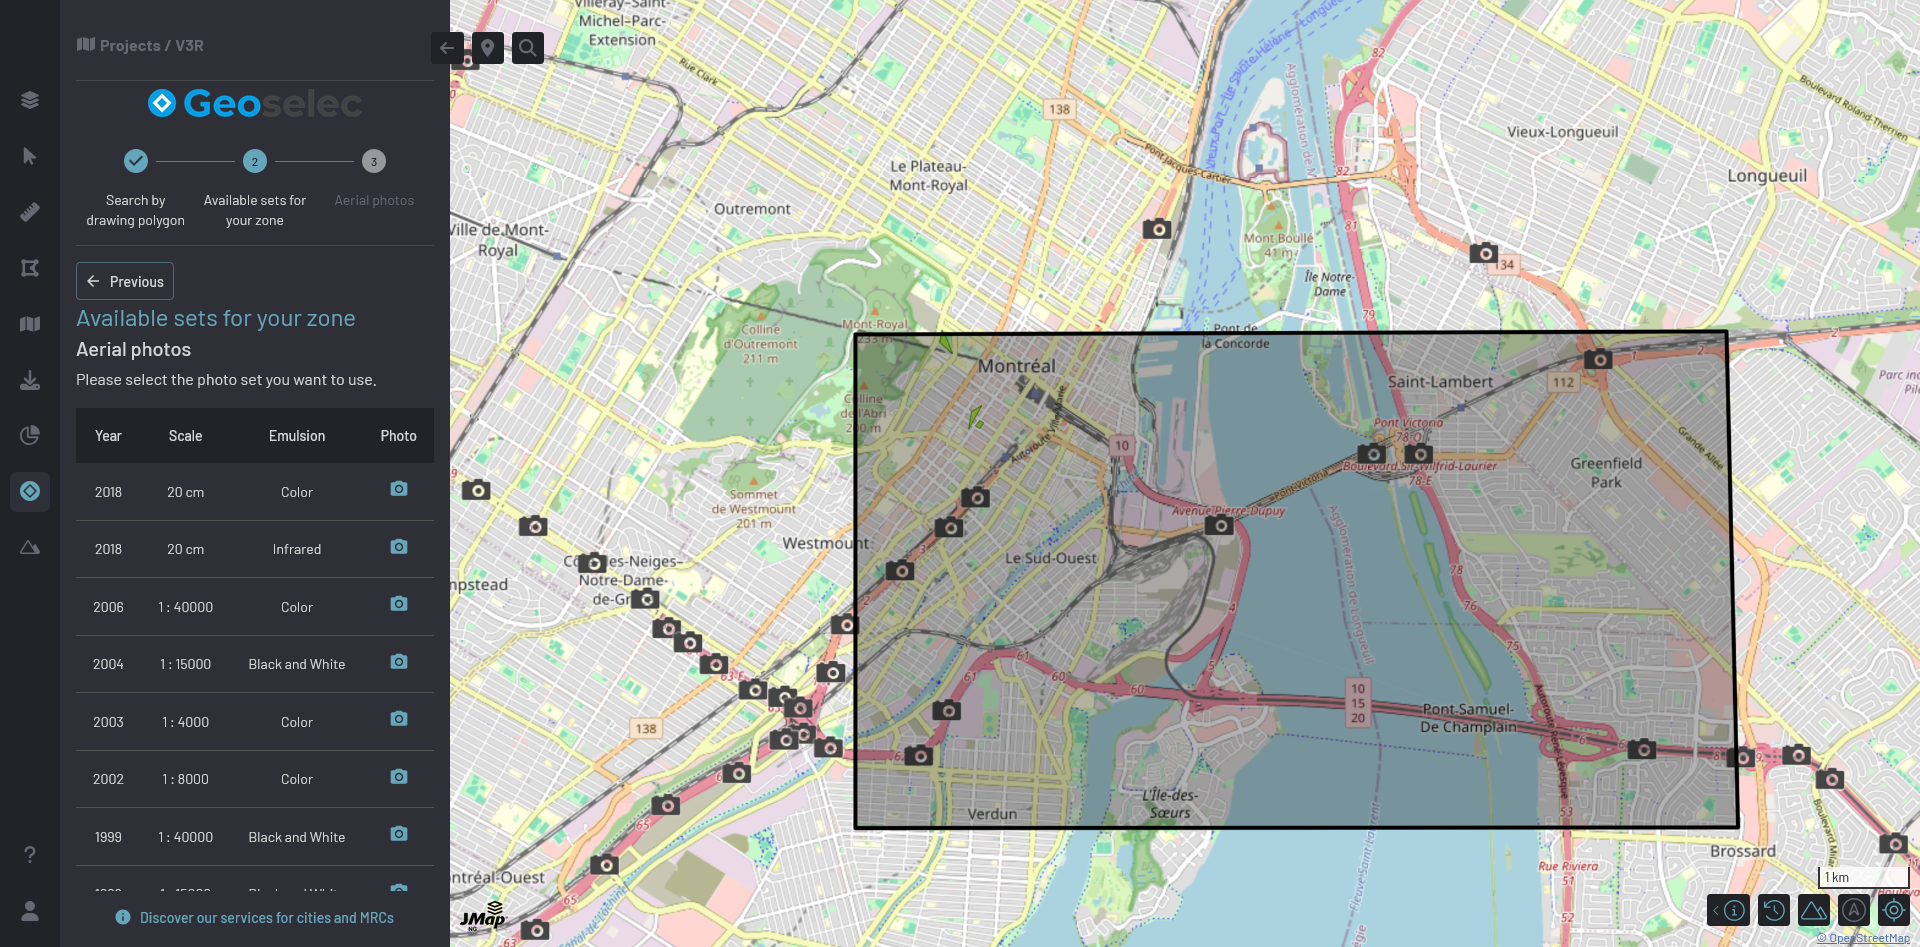
Within Organization, Administrators can enable extensions. Extensions are modules that can be added to a project, providing functionality from third parties in a similar manner to plugins in QGIS. Once an Administrator enables an extension, it can be used in any project within that organization. An example of an extension is Geoselec, which allows users to find historical aerial data for selected areas. After selecting an area on the map, the user will be shown Geoselec’s aerial imagery library, along with each image’s year, scale and emulsion.
Managing Data
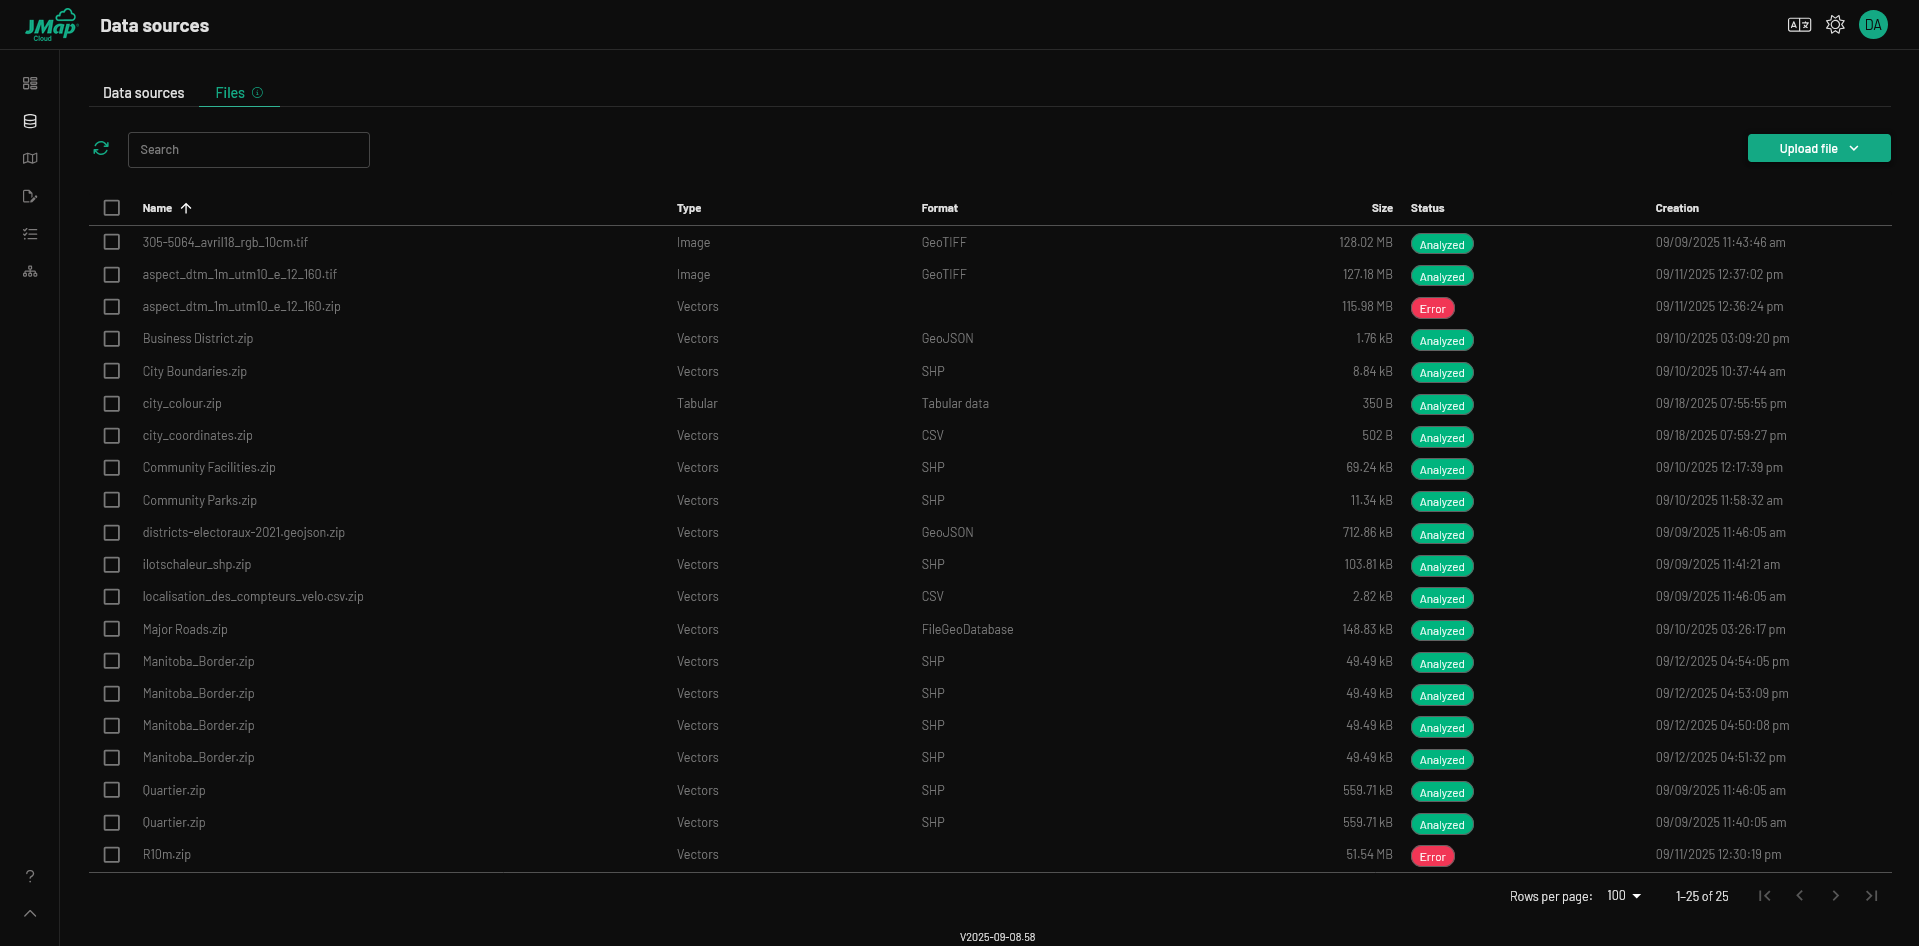
Data can be uploaded through the Data sources section. Within Data sources, there are two screens for uploading data – Files and Data Sources (DS). Data which is uploaded to Files is temporary, while DS are permanent sources for use in projects. Using Files, it is possible to create more than one DS, which is useful for users needing similar data with different attributes, projects, or tags. Be cautious, as data uploaded to Files will disappear after 10 days.
DS are permanent and can be used as layers or tables within any of the organization’s projects. DS can be created from data saved in Files, or uploaded directly from the user. Once a DS is created, users can change editing permissions or update data with a source from Files or through an upload from the user. If a user is working with vector data, it is possible to alter attributes and create relationships with non-spatial tabular data.
JMap Cloud supports a range of vector formats, including shapefiles and Esri Geodatabases. Data can be uploaded directly from the user or accessed from a web mapping or web mapping tile service. It is also possible to access data from a feature layer or vector tile service, although both functionalities have been temporarily disabled. JMap Cloud supports raster data in GeoTIFF format and tabular data in CSV format. When importing data, vector and tabular data must be zipped before upload, while raster data should be uploaded directly as a GeoTIFF file. If a user wants to create a raster mosaic, each individual raster should be uploaded separately to Files, before being used to create a single mosaic DS.
There are extra considerations for users working with vector data. By indexing attributes in a DS, users can search for specific attributes values using the JMap NG search bar. This will work for any project using an indexed DS. Users can also create value domains within DS and create relationships between vector data and tabular data.
Creating a Project
Map projects can be accessed through the Projects section. In order to interact with a project, a user must have the appropriate project-level permissions, which can be assigned based on a user’s organizational role. Users in the Viewer role can be granted permission to view selected projects, while users in the Editor or Administrator role can be granted permission to modify or own selected projects.

To create a new project, click the “Create a new project” button and set the desired parameters and extensions. If a user is concerned about optimization, they can create a cache in the vector tile cache interface. Additionally, it is possible to adjust settings and permissions for each project. When a user is ready, they can view a project through the JMap Studio or JMap NG interface
JMap Studio
JMap Studio (shortened to Studio) is the JMap Cloud project editing interface. If a user has previously created DS, they can be found in the right panel. By dropping any DS onto the map, it will become a map layer. Information about map layers can be found in the left panel.
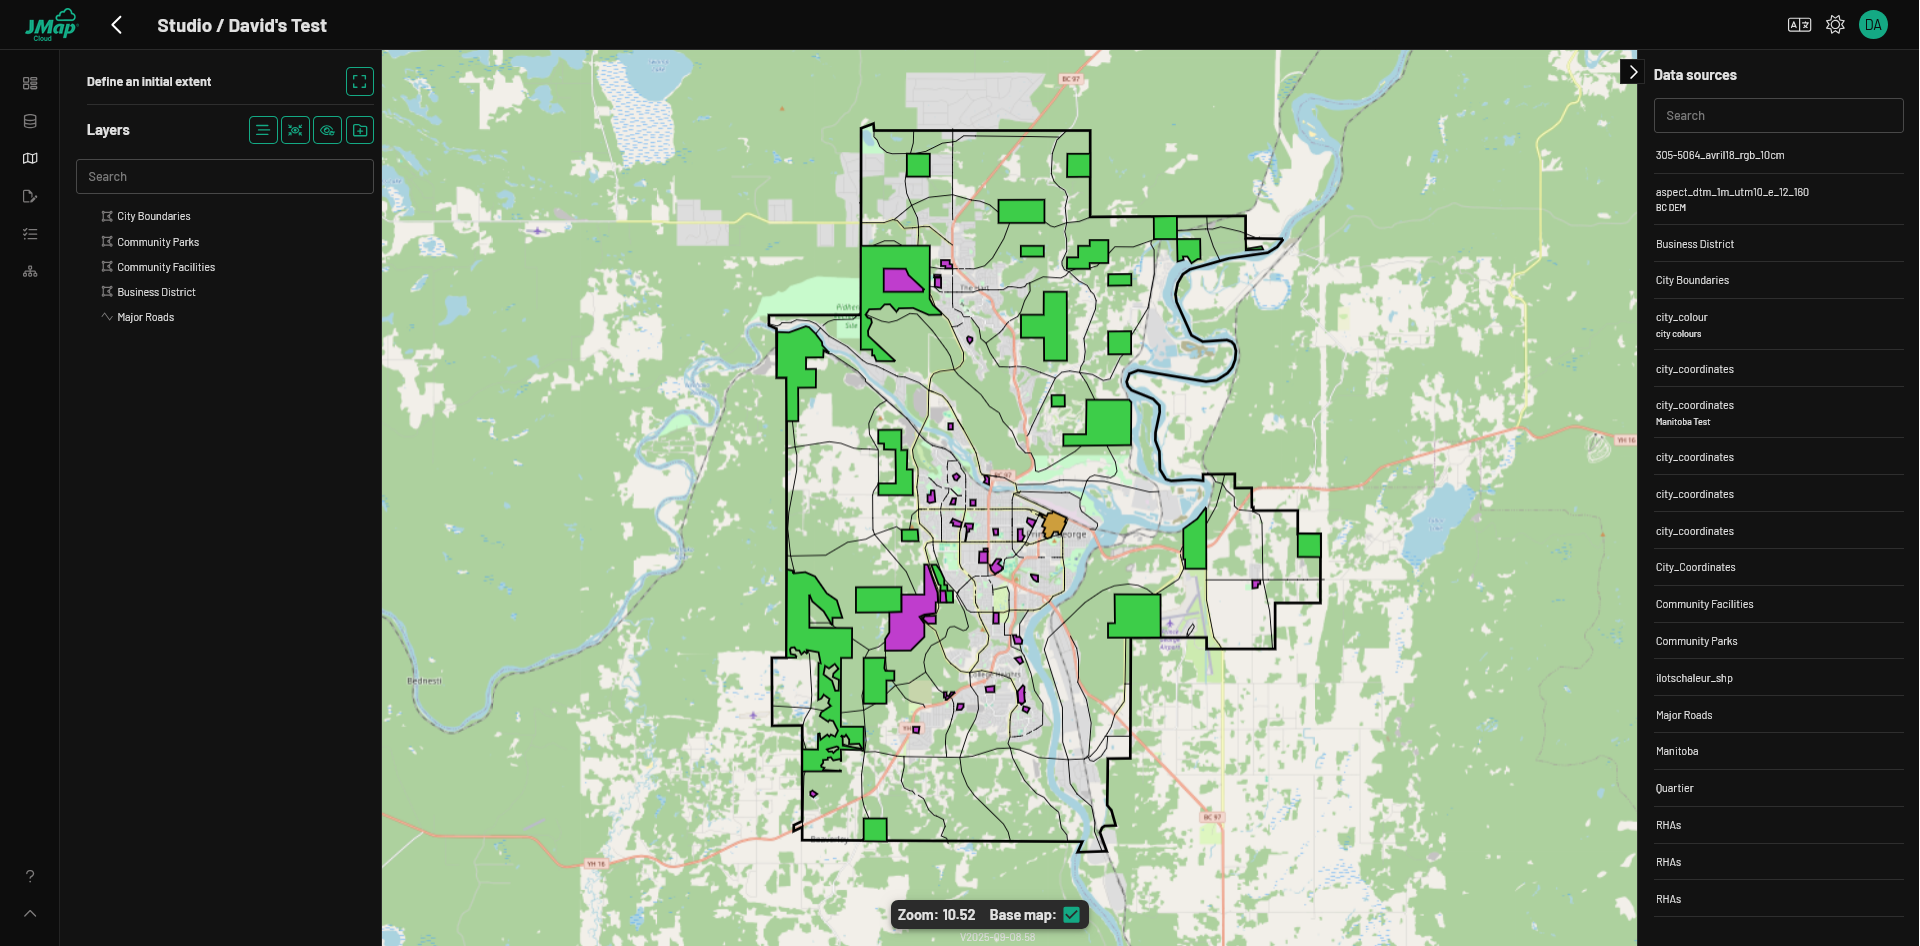
By clicking on any layer in the left panel, users will see layer information, including a checklist of attributes. Layer attributes can be turned on or off at any time, determining whether they can be used in labels and popups. It is possible to adjust individual layer visibility and by selecting “Enable Editing Tools”, users will have the ability to create, modify, and delete features within the JMap NG interface. The ability to edit layers will be based on permissions set in the underlying DS. Be cautious when enabling editing, as it can cause performance issues for layers with larger files.
If a user is concerned about performance, they can set a generalization level within each layer. This will reduce the complexity of layers when viewed. Users can change layer properties – such as symbology, popups and labels – through the left panel and filter layer features based on conditional statements. Presently, popups can only be viewed in the JMap NG interface. This functionality will eventually be available in Studio.
Studio contains several elements which aim to improve the mapping experience. When enabled, “Focus Mode” ensures that only the active layer appears on the map, temporarily hiding other layers and making it easier to work with complex projects. There is a separation between the layer list and layer ordering, which allows users to rearrange and organize the layer listing without affecting the layer order on the map. Additionally, it is simple to set the default extent of the project by activating the “Initial Extent” tool, allowing users to create a view box within the map.
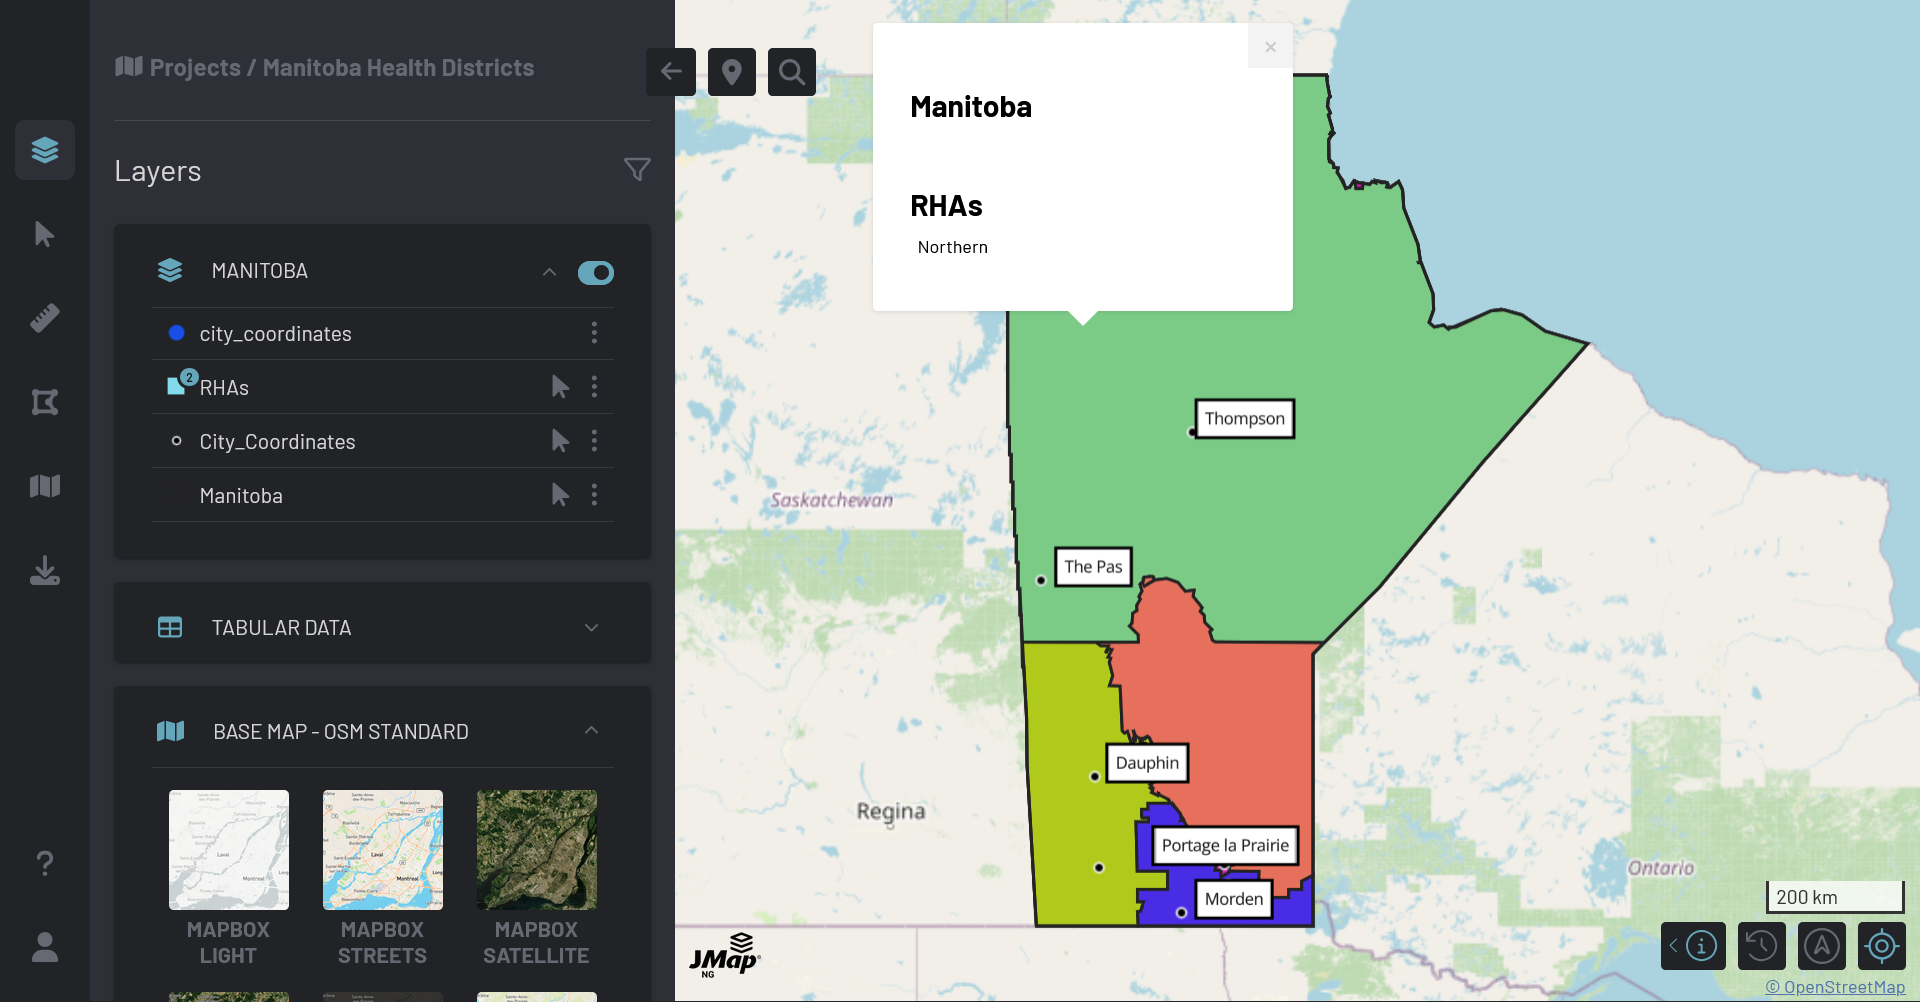
JMap NG (Map Viewer)
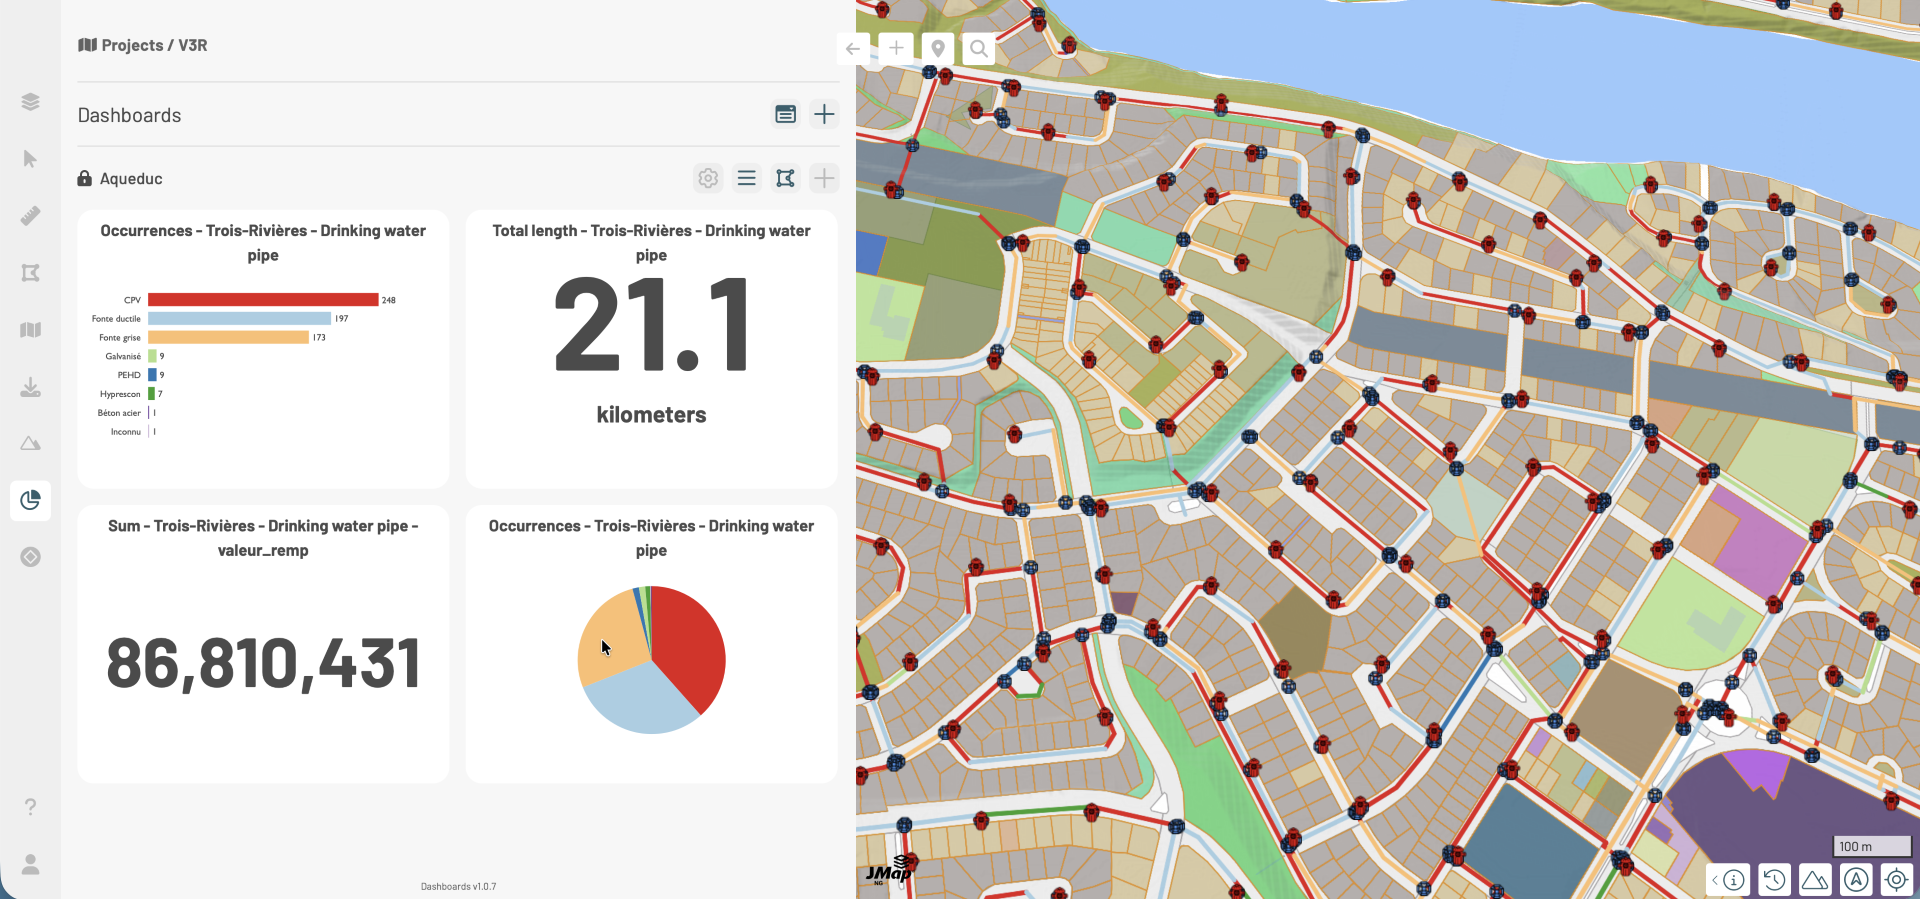
Opening any project in JMap NG will take the user to the public-facing version of the map. JMap NG contains basic mapping functionality, allowing users to interact with layers, perform measurements and create annotations. If any of the map layers come from an indexed DS, it is possible to search for feature attributes in the search bar, and if editing has been enabled on any layer, user can edit layers based on established permissions. If users have created forms, it is possible to access them through JMap NG. Forms can be created through the Form Designer in the Forms section and can be customized to include a range of inputs and design styles. Forms can be accessed via the “Form Manager” button in the layer popup.
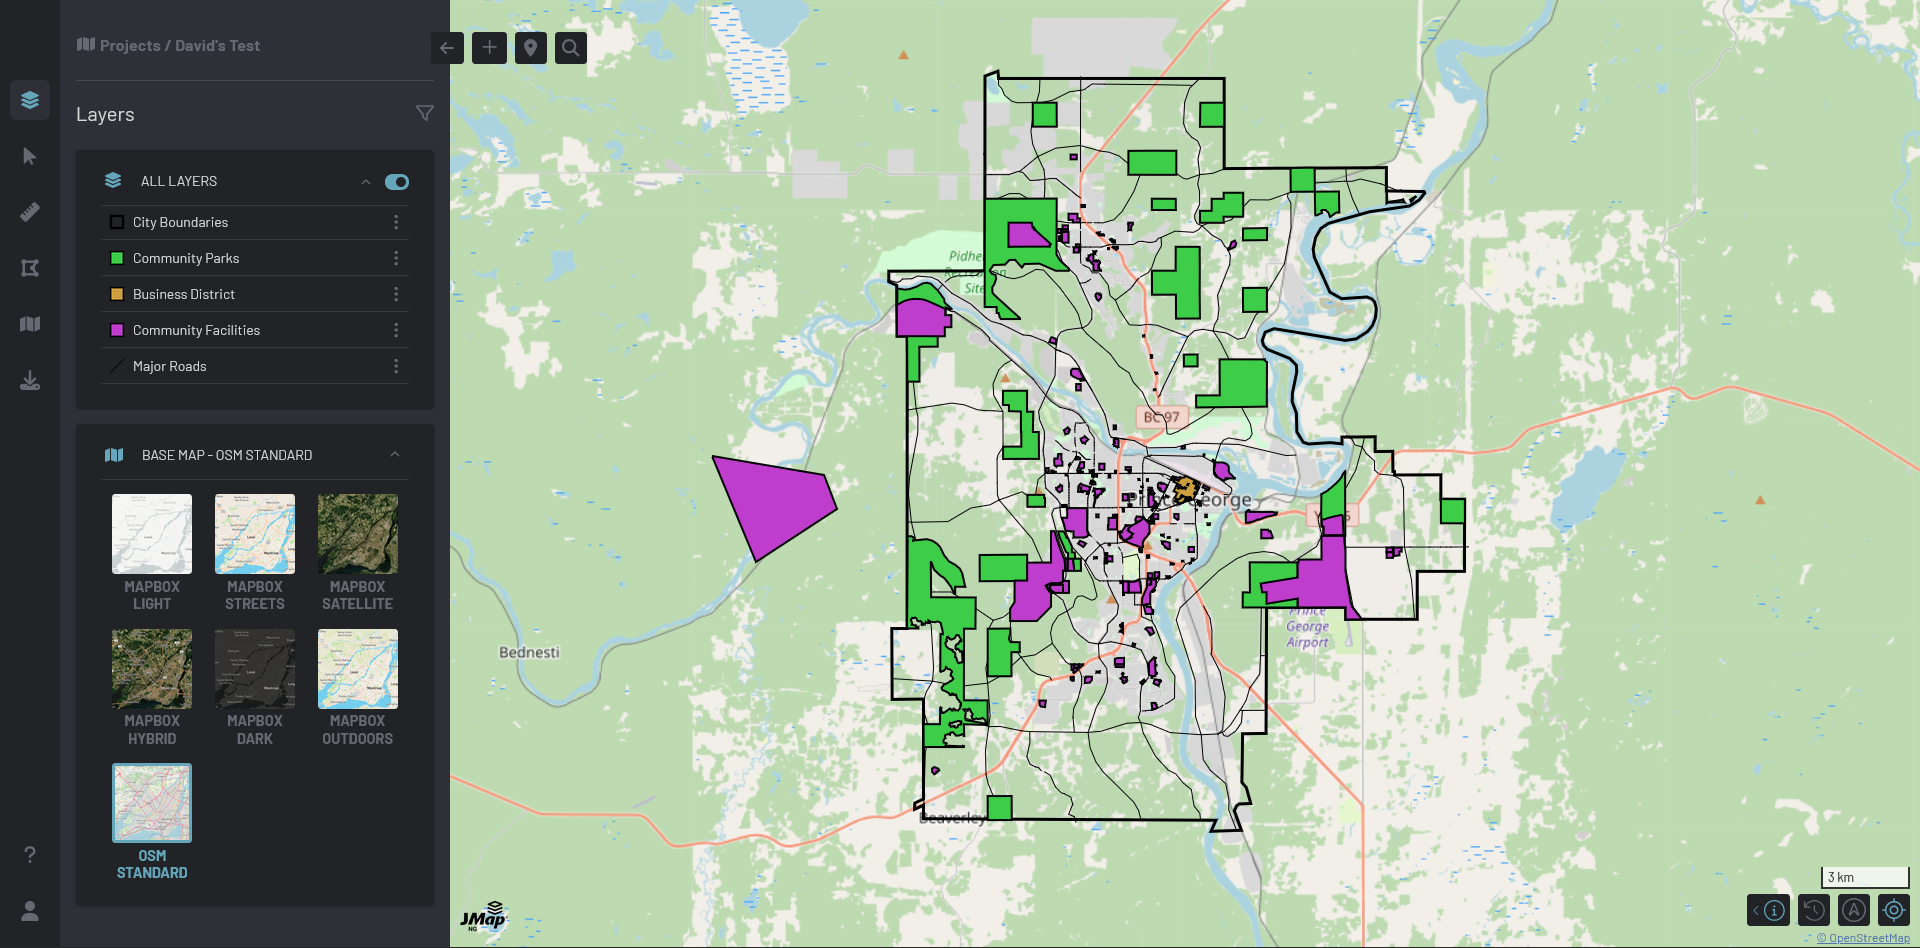
While JMap NG supports digital terrain models (DTM), they are not presently supported in JMap Studio. This means that the only method for adding a DTM to a project is by using the JMap Cloud API. If a user wants to view a DTM, or any other component of the project, they can alter the aerial view of the map by clicking and holding the right mouse button. This will allow users to see 3D view of the project.

Interoperability with Other Platforms
One of the signature features of JMap Cloud is its ability to interface with a range of platforms, including QGIS. By installing the JMap Cloud plugin, users can access JMap Cloud projects through QGIS. After linking the two platforms, users can export projects from QGIS into JMap Cloud – turning them into a JMap Cloud project – or open JMap Cloud projects in QGIS, allowing users to leverage QGIS functionality and save changes to the project in the cloud.
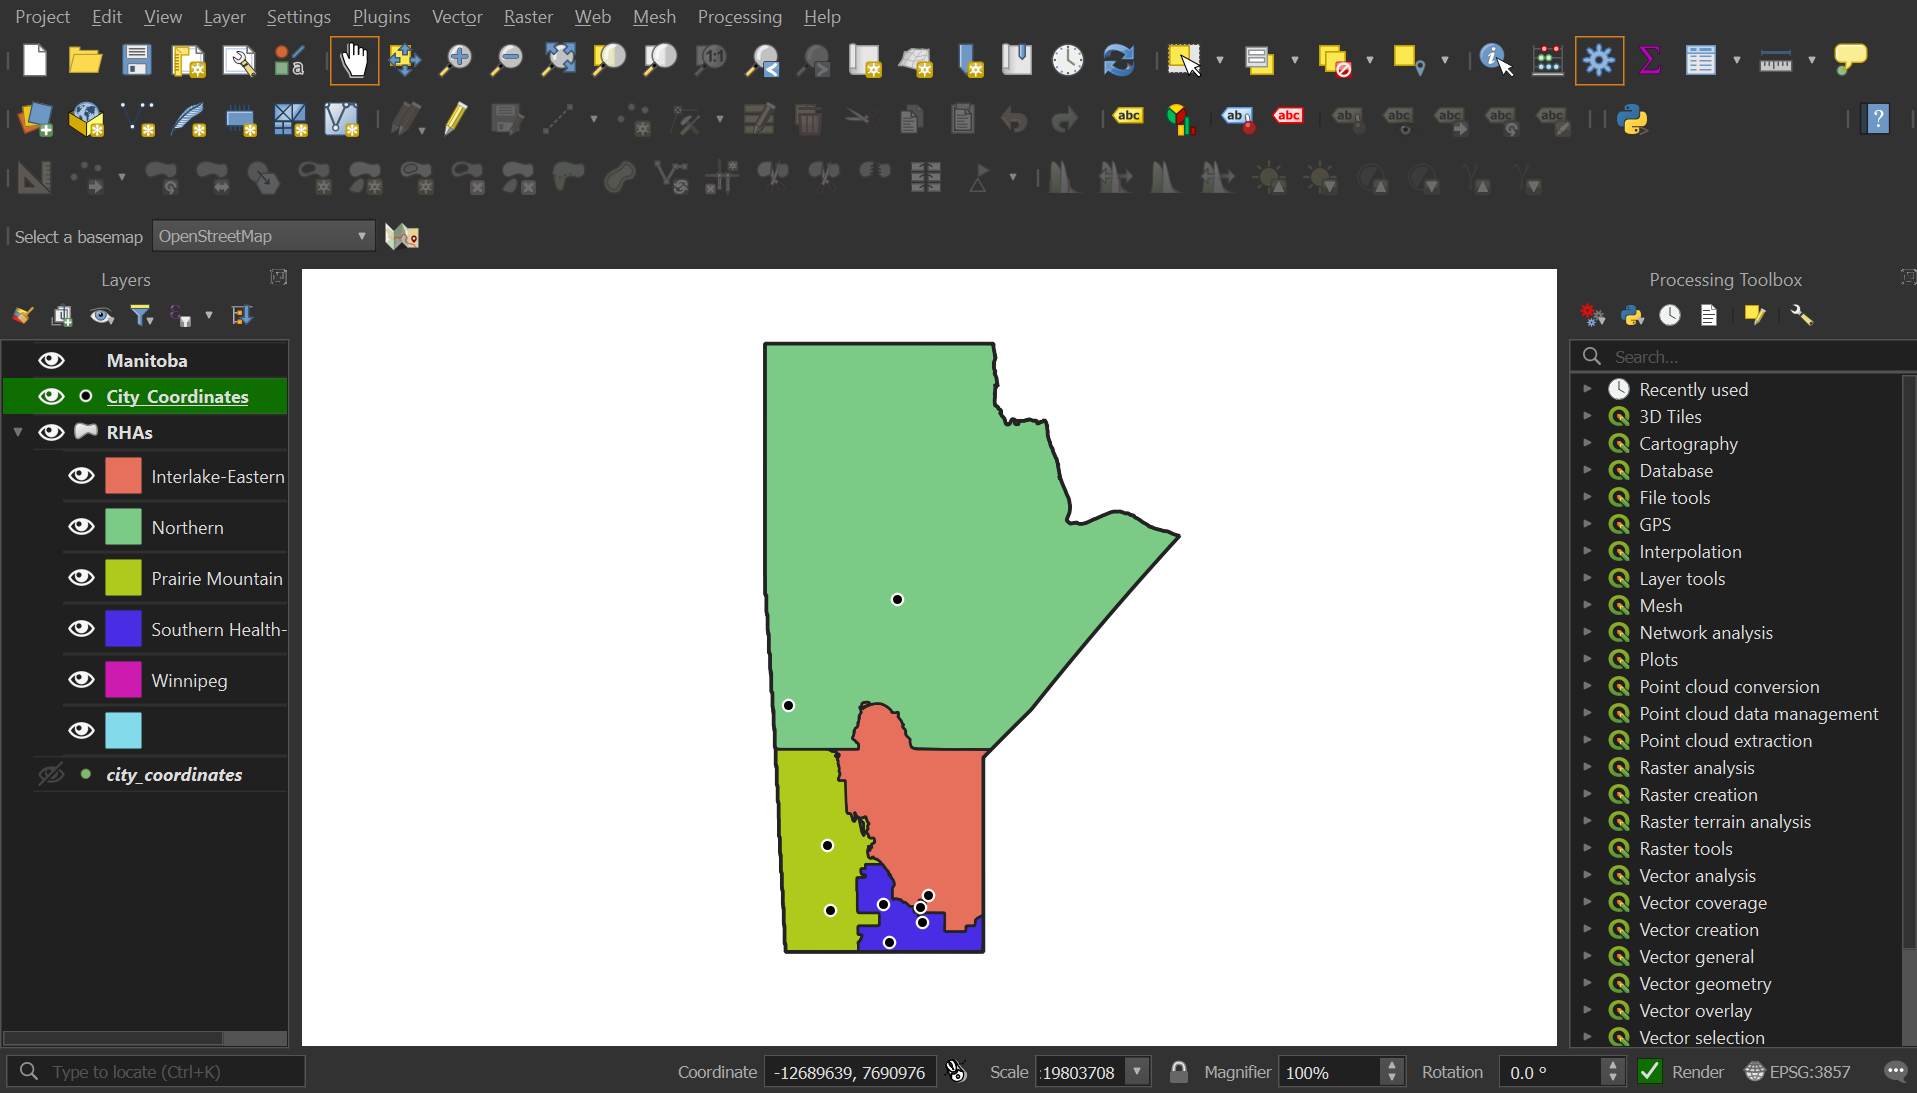
Users should be aware of some considerations when working between JMap Cloud and QGIS. When creating features in QGIS on a project hosted in JMap Cloud, users must be aware of domain rules. If a new feature contains a value that does not match a domain rule, the feature will be rejected. Additionally, users should be aware that when they export projects from QGIS, advanced functions and styles may not be imported correctly into JMap Cloud. This is an ongoing issue which will be eventually fixed.
JMap Cloud allows users to access different platforms via APIs. API keys can be created in the Organization section by those with an Administrator role. One example of a platform that can be accessed via an API is JMap Server – an older product from the JMap line – which allows users access data hosted on the platform. The continued interoperability of other platforms alongside JMap Cloud is an ongoing process.

Documentation
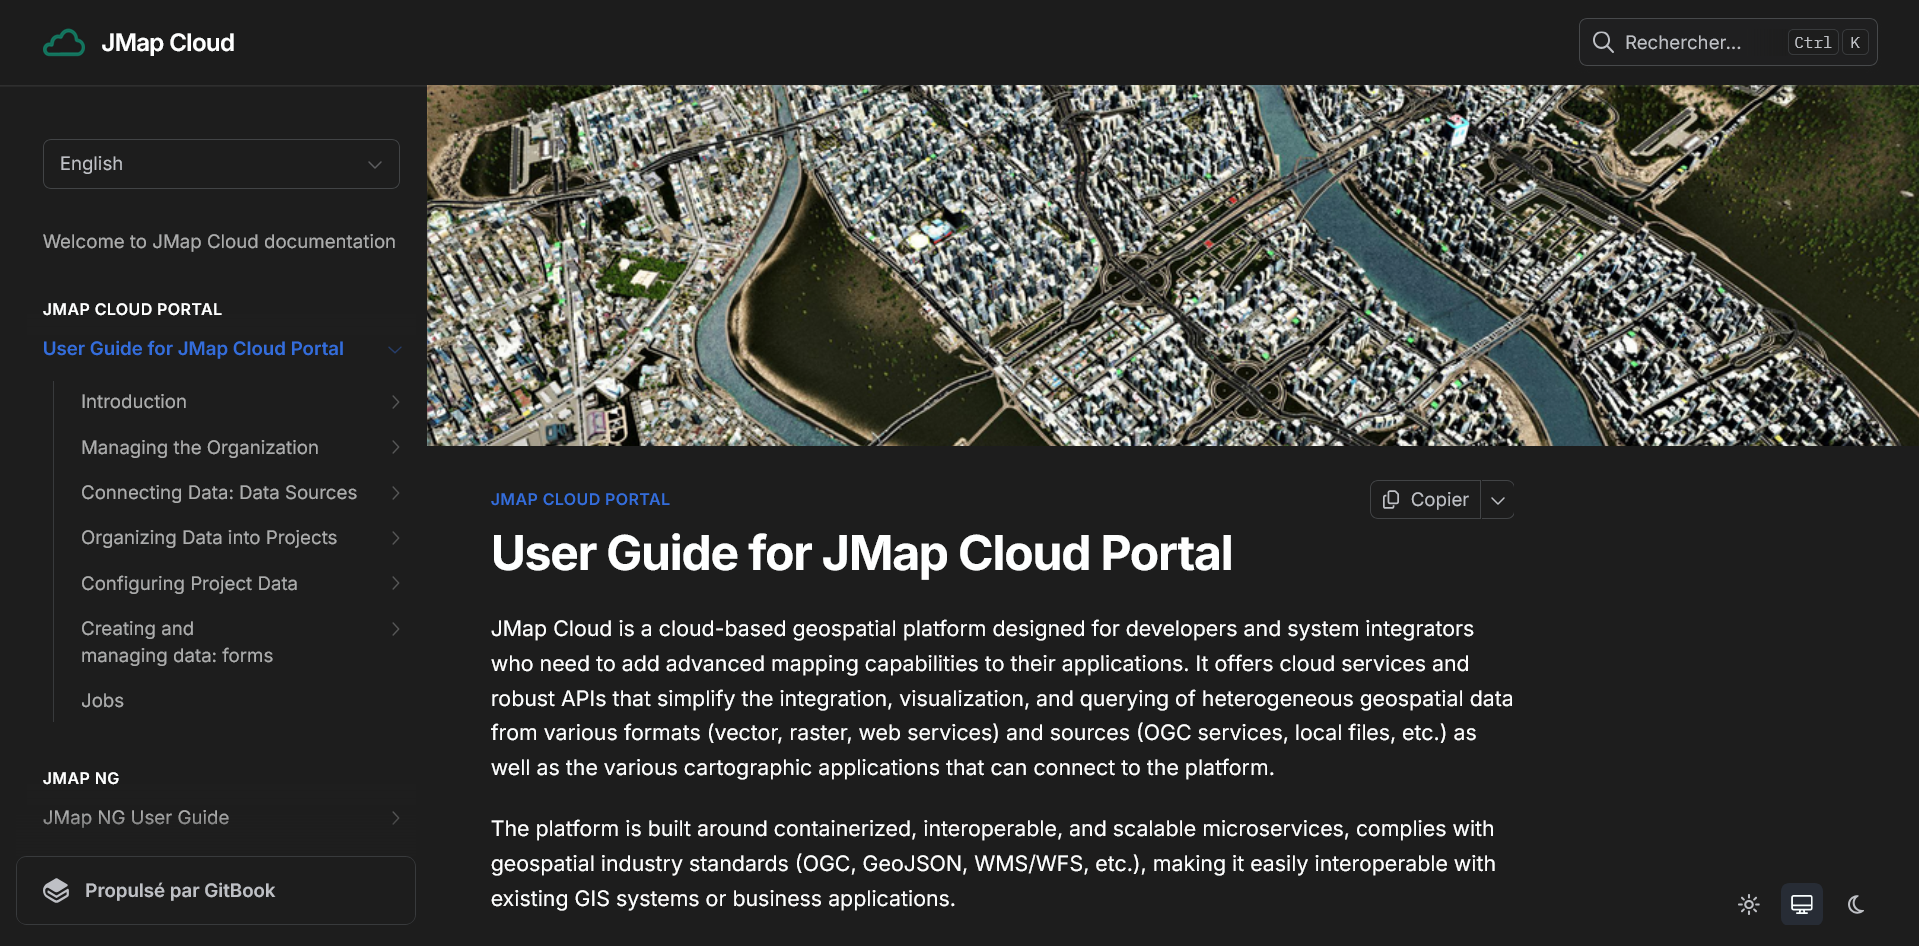
JMap Cloud comes with extensive, detailed documentation for both casual and advanced users of the platform. Documentation can be accessed via docs.jmapcloud.io, or through the links found at the bottom of the dashboard in JMap Cloud. Users will find information on the JMap Cloud platform, along with details about the JMap Cloud API.
There are several sections of documentation that focus on the JMap Cloud platform. The first section is about JMap Cloud Portal, which contains information about accessing the platform, as well as technical components and organizational roles within JMap Cloud. The next section focuses on JMap NG, discussing navigation of the interface, functionality and developer information. Lastly, users can find documentation about the JMap Cloud Plugin for QGIS, discussing steps for installing the plugin, as well as connecting, editing and exporting projects through the QGIS plugin.
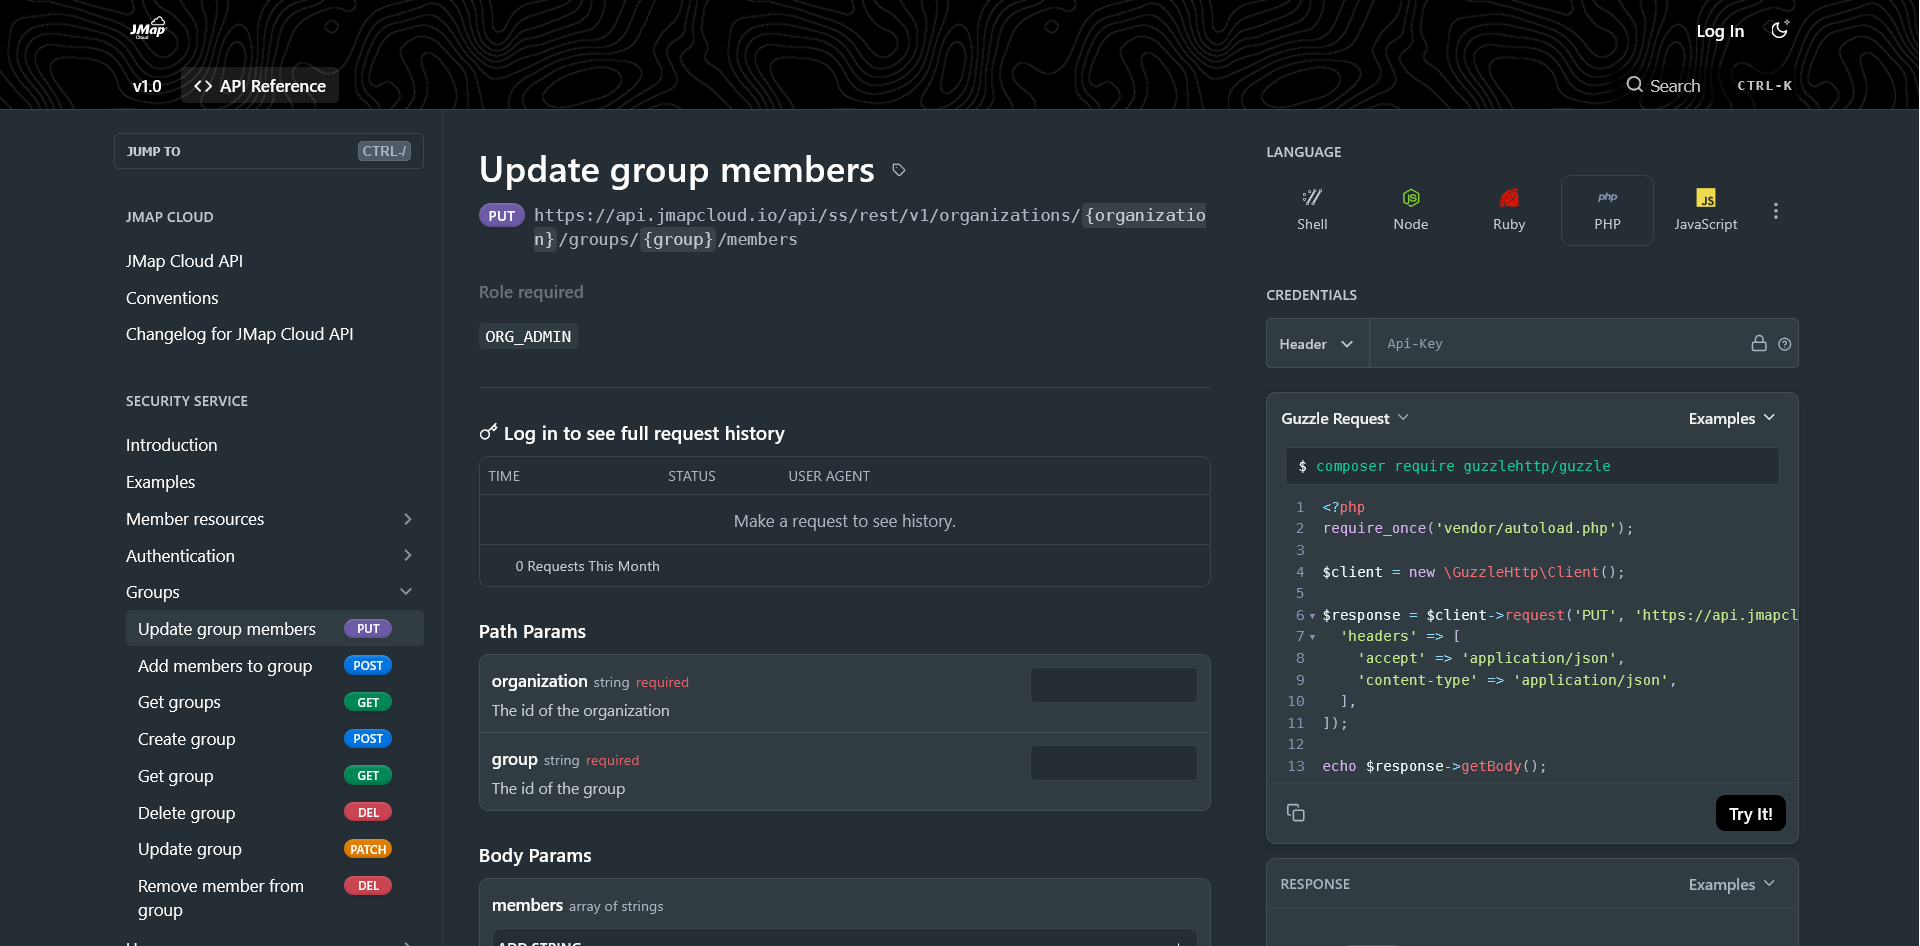
Alongside documentation for the JMap Cloud Platform, users will find documentation on the JMap Cloud API. This documentation outlines the many functions that can be performed with an API key, including functionality related to security, map configuration and data sources. For each available API call, users will find information about parameters, responses and – if they are signed into their JMap Cloud account – API request histories. There is a high level of interactivity in this documentation, allowing users to view and test API calls in different languages.
If accessing the documentation through the JMap Cloud dashboard, users will find a link to the JMap blog. The blog is located on K2 Geospatial’s website, sharing updates about the company and JMap. The blog has writing on a range of subjects, including technical topics, community engagement and past scholarship opportunities.
My Experience
I found JMap Cloud to be a simple, easy-to-use platform. I like the design of JMap Cloud, which I think is clean and generally intuitive. I initially found the data importing process to be complicated, but as I became more familiar with DS and Files, it became more straightforward. While working in Studio, I was impressed by the layout of the interface, which I could tell had been designed with user experience in mind. I was pleased by how simple it was to move projects between JMap Cloud and QGIS, with the process entirely managed through the QGIS plugin. I found JMap NG to be similarly intuitive, with a simple and clean interface.
I think the JMap Cloud documentation strikes an effective balance between providing highly technical information while remaining engaging to readers. I particularly enjoyed the JMap Cloud API documentation, which was highly interactive and occasionally fun, which an unusual trait for any set of documentation. I particularly enjoyed the interface for examining API calls in different languages.
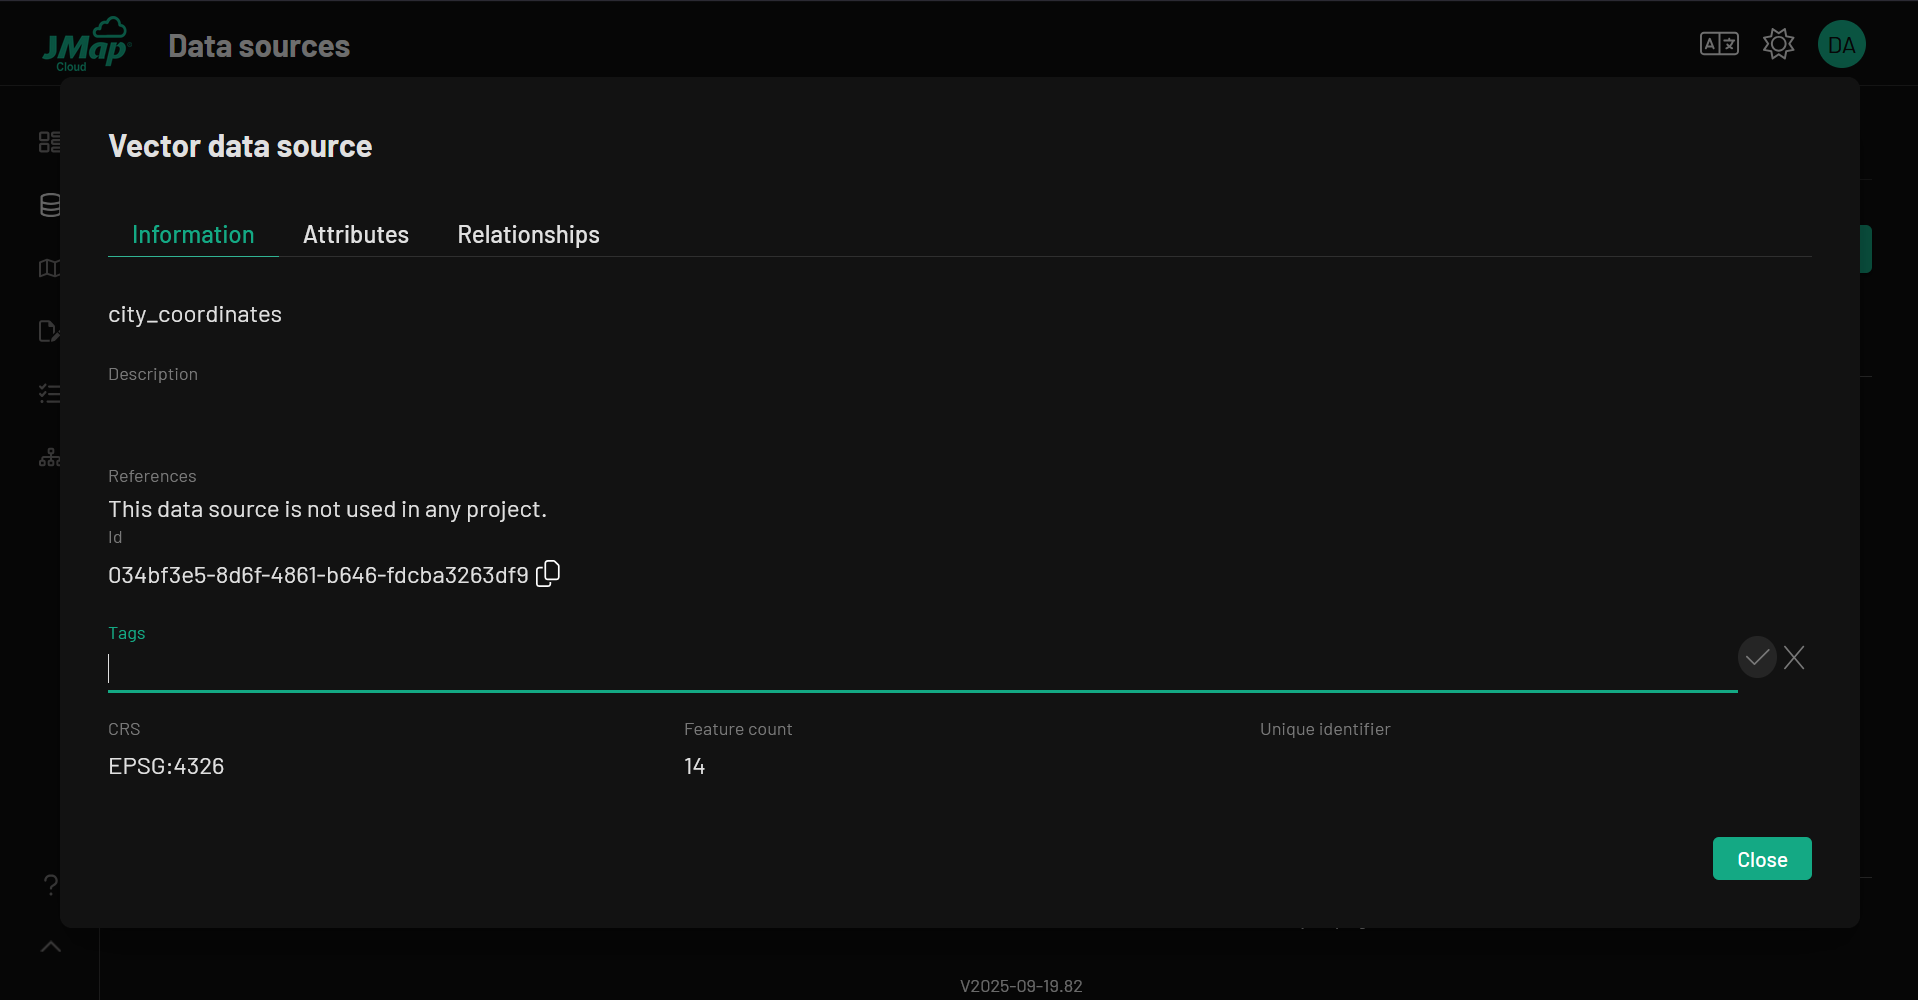
As I was working with JMap Cloud, I could periodically feel the impacts of a platform in easy release. Aside from minor limitations and the disable functions previously noted, I encountered some other small issues while testing the platform. When creating DS, I was initially unable to create tags. Anytime I entered a value and clicked the check mark for submission, the value would disappear and leave the tag empty. I eventually learned that I was first required to hit “Enter” before clicking the check mark, which did allow me to create a tag. I found this process to confusing and in my opinion, it is one of the only components of JMap Cloud that is counterintuitive. Additionally, when I created my first project with editing enabled on a layer, the layer did not appear in JMap NG. The only way I could fix this was to re-enter Studio, delete the layer and re-add it to the map. After fixing this initial layer, I did not have any further problems with editing-enabled layers.
Overall, I believe JMap Cloud to be a powerful geospatial platform. While the platform itself is simple – only providing a basic set of map creation tools – JMap Clouds thrives is in its role as a bridge between platforms and a highly customization workspace with a range of third party extensions. JMap Cloud is a relatively new product, which means it is only going to expand in its scope of interoperability and functionality. If you are an organization that is seeking a versatile geospatial tool and are concerned about data sovereignty, why not consider JMap Cloud – a home-grown geospatial solution.


Be the first to comment