“Bands” Around Edges Of Polygons – ArcGIS Online Tip
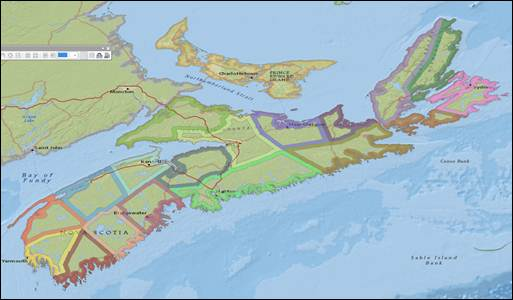
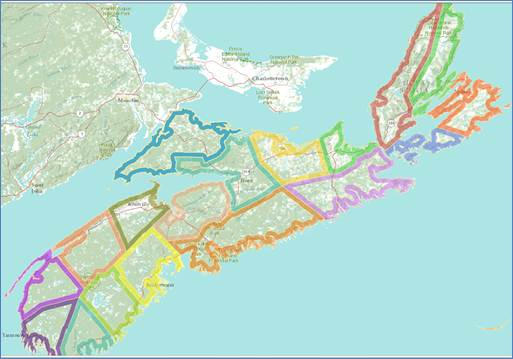
The essence of this article is: preparing a thick border around polygons for display on ArcGIS Online (but also in ArcMap); note I am using what is now – Nov 2012 – referred to as ArcGIS Online Personal, rather than ArcGIS Online for Organizations. The trick, is to have those thick borders only inside the polygons; traditional cartographic borders are drawn inside and outside polygons. I got the basic idea from Esri’s Liz Sarow, and wanted to try it on my own. Here’s an example:
Figure 1: Thick (5 km) borders around inside of each NS County (ArcMap)
Figure 2: Thick (5 km) borders around inside of each NS County (ArcGIS Online)
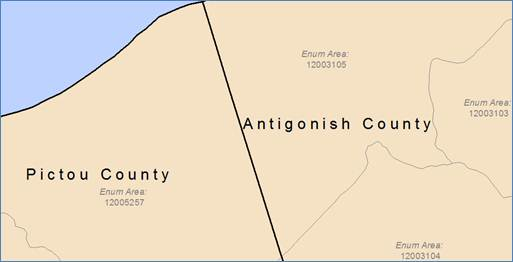
Original data has extraneous-to-us lines inside each county.
Figure 3: original county data has interior lines (ArcMap)
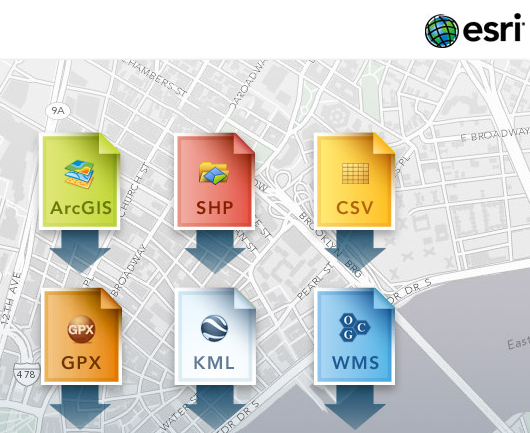
Note that ArcGIS Online allows data upload in a number of formats, but not as file Geodatabase Feature Classes.
Figure 4: possible data formats available for uploading to ArcGIS Online
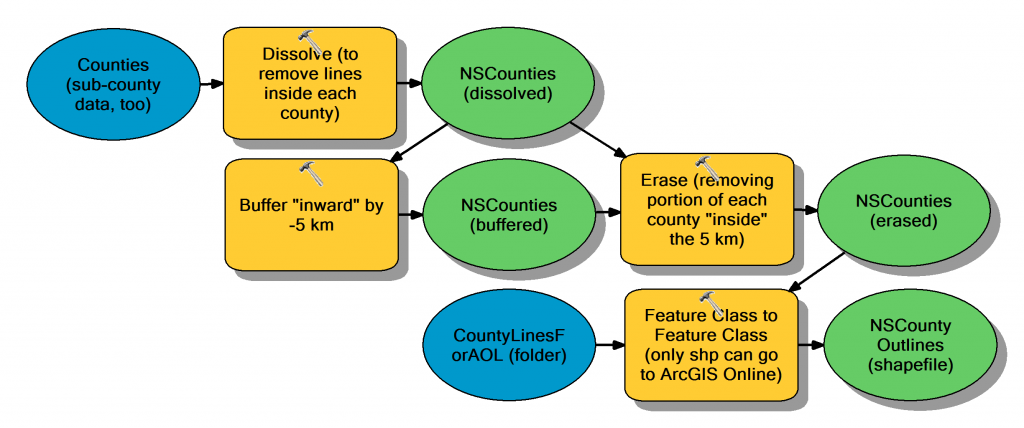
The ArcMap model (1) dissolves interior lines; (2) buffers inwards; (3) erases interior of each county; (4) converts to shapefile.
Figure 5: modelbuilder to dissolve, buffer inward, erase interior, & convert to shapefile (ArcMap)
The buffer distance of -5 km works for this map by “buffering inward”; in Liz’s example, I suspect she used a value (for much larger regions of the USA) such as 10 or 12 miles. This value must be jigged for each unique situation.
So, process data in ArcMap to get just the lines of interest (could also generalise, too); buffer inward; erase inside of polygons; convert to shapefile; upload to ArcGIS Online; prepare any symbology; publish your map!
You can click this temporary link to see the online version: http://bit.ly/RuVcNF




Great article. I always wanted to create a way to show an effect where you could see the illusion of depth of water from shore when you had no bathy to do it. I could see adapting this for that purpose. So lighter blues going to darker. I’ll have to play with it. Thanks David!
Hi Gerry … agreed light-to-dark going from shore. Perhaps use the multiple-ring-buffer tool. Glad the article sparked an idea – cheers!
Dave taught me GIS at COGS. My first week I can still remember asking him….”So this whole raster vector stuff… is that going to be important?” Just kidding!
Thanks for the article Dave!
Happy to oblige, Jon; thank you for GoGeomatics!
First of all I would like to say great blog! I had a quick question in which I’d like to
ask if you do not mind. I was interested to find out how
you center yourself and clear your head before writing.
I’ve had a difficult time clearing my mind in getting my thoughts out.
I truly do take pleasure in writing however it just seems like the first 10 to 15 minutes are generally lost simply just trying to figure out how to begin.
Any recommendations or tips? Kudos!
Hi Edna;
Thanks for your note. For this type of article, I think about (1) end result, (2) starting point, and (3) key steps involved. I work up illustrative images, then wording. After a break, I review the article to ensure it flows and answers critical questions (and doesn’t miss any steps).
Usually, there are a few edits.
Idea to try: take those first 10 to 15 minutes and write down (or think through) parts 1, 2, 3 above – especially 1 & 2. {For instance in creating this: after reading your comment, I thought for a while about “what might Edna need” before typing.}
All the best as you continue your “writing journey” – Dave
Terrific article! That is the type of info that should be shared across the
internet. Shame on the seek engines for not positioning this publish higher!
Come on over and seek advice from my web site . Thanks =)
Thanks for your comment; much appreciated.