Factory Tour: Building a Future for Geomatics and Reality Capture
For more than a century, the Heerbrugg-Switzerland campus of Leica Geosystems has been a bastion of precision engineering and manufacturing. It is a place where the future is continually envisioned and turned into products and solutions.
The modern-day physical tools of surveying and reality capture are among the most sophisticated electro-mechanical-optical instruments ever manufactured. Add to this, software to synchronize components, algorithmic (and now AI) steps, a massive amount of instantaneous processing needed to make all this happen, and you get near-sci-fi devices in your toolkit for day-to-day field operations.
Conceptualizing, engineering, and manufacturing such devices does not come easy, and for top performance, it cannot come cheap. Certainly, there’s a wide variety of options out there. But why do people keep coming back to a select set of manufacturers? I have posed this question to many surveyors and geospatial professionals over the years, and the answers are nearly always the same: when the stakes are high, you need top precision and reliability.
When you see how something is engineered and manufactured, it can give you an idea of what to expect in terms of performance and reliability. In the case of the Leica Geosystems (part of Hexagon) flagship facility in Heerbrugg, Switzerland, what I saw during a recent tour reinforces why I believe the solid reputation is well earned. For a brief history, see the sidebar “The Wild Legacy”.
I had last toured the facility a decade ago when the then wave of innovation featured scanning total stations like the Leica MS50 Multistations (and now MS60). This time around, the traditional geomatics solutions line of products is sharing the facility with the engineering and manufacturing of “reality capture” solutions. Five years ago, an entirely new Reality Capture division was formed, to include the mobile mapping systems, BLK family of scanning and imaging solutions, and conventional terrestrial scanning.
We were fortunate to have as our guide for the tour, the polylingual André Zutter. He has had a long and distinguished career with the company, including training users of photogrammetric solutions in 40 countries.

The Heerbrugg campus of Lecia Geosystems. Heinrich Wild established his original machine works here in 1921 – Photo: Michelle Byrne
The Wild Legacy
In the late 19th century, Heinrich Wild entered an engineering apprenticeship in his home country of Switzerland. He became proficient in using a theodolite, performed surveys, and later became a trainee with the Swiss Federal Office of Topography. He had felt that theodolites could be designed to be lighter, less bulky, less cumbersome, and more precise. This inspired him to begin designing surveying instruments in 1905. To take advantage of recent advances in optics and high-precision manufacturing, he joined the Carl Zeiss company in Jena Germany to grow their new division for surveying instruments.
New concepts were employed for the first time in such instruments. For instance, instead of metal circles, glass circles, and optical reading scopes were incorporated. The Carl Zeiss Company was already a developer and manufacturer of microscopes and other optical scientific instruments. Key to this success was physicist Ernst Abbe, and chemist Otto Schott who pioneered key elements of modern glass and optics manufacturing. This crucible of research, development, and manufacturing in Jena provided the means for Wild to fulfil his vision for surveying instruments. Wild began designing levels, and then the Th1 Theodolite in 1921. These instruments were considerably smaller and lighter than the instruments of that era. Consider the long telescopes of the instruments of the day; Wild’s designs had short, but very accurate scopes, and became the standard form factor for theodolites—even today.
Returning to Switzerland in 1921, Heinrich Wild (the inventor) founded, together with geologist Dr Robert Helbling (the practitioner) and Jacob Schmidheiny (the entrepreneur) formed the new company, Heinrich Wild, Werkstätte für Feinmechanik und Optik, Heerbrugg. The mission for this new company was outlined in the contract Wild entered with his partners:
“Establishing a simple company for the purpose of manufacturing and selling precision mechanical-optical instruments, especially surveying instruments and exploitation of Wild’s inventions.”
The new firm established works in Heerbrugg, near the Austrian border in eastern Switzerland. The town was a considerable distance from suppliers and resources. Out of necessity, the company campus in Heerbrugg expanded from one structure to many, as mechanical and glass manufacturing works were added. The business grew rapidly.
Wild was more interested in designing instruments than running a business, and in 1930 he left his namesake company to become a designer for then-competitor Kern & Co. (founded in 1819). The firm he had co-founded changed its name to Wild Heerbrugg in 1954. There were other notable cooperative agreements and acquisitions, including Ernst Leitz Wetzlar in 1986 and Kern & C0. In 1988. The name Leica is a portmanteau of Leitz and camera. From the combined legacy of Wild, Kern, and Leitz, 3 separate companies were established in 1997: Leica (Camera), Leica Microsystems (microscopes and scientific instruments), and Leica Geosystems (surveying and geomatics instruments and solutions). The latter was acquired by Hexagon but has kept its distinct Geosystems identity and focus. Note that Leica (the famed camera company) is not directly affiliated with Geosystems or Hexagon.
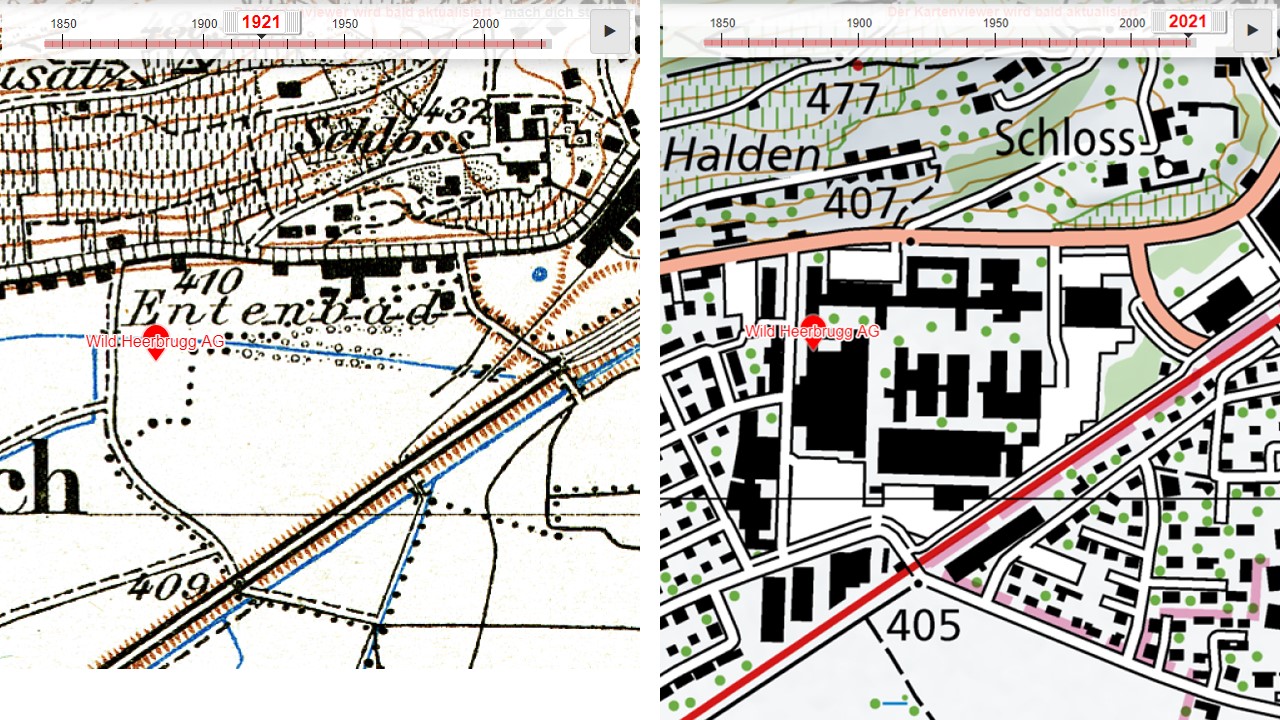
Hisotrical maps from the Swiss Topo (national mapping agency) historical map viewer show how the site grew over a century.
A key takeaway from the name changes and acquisitions is that there has been a continuum of excellence in research and development, engineering, and manufacturing for over a century (two if you include the Kern legacy). While Leica Geosystems now has many facilities worldwide, including a centre for software development in San Ramon California (from the acquisition of Cyra Technologies), the heart and soul is in Heerbrugg where it all began.
The graphics on an administration building along Heinrich Wild Strasse pays homage to the surveying and geomatics roots of the company.
The Mechanical Foundation
No matter what electronic and photonic wizardry is employed in today’s instruments, the foundation must begin with highly refined mechanical components. This has always been a top priority since the days of Heinrich Wild, who established precision machining capacity in the Heerbrugg facility from the earliest days. What goes on in the machine shops must meet specifications far and above the ordinary.
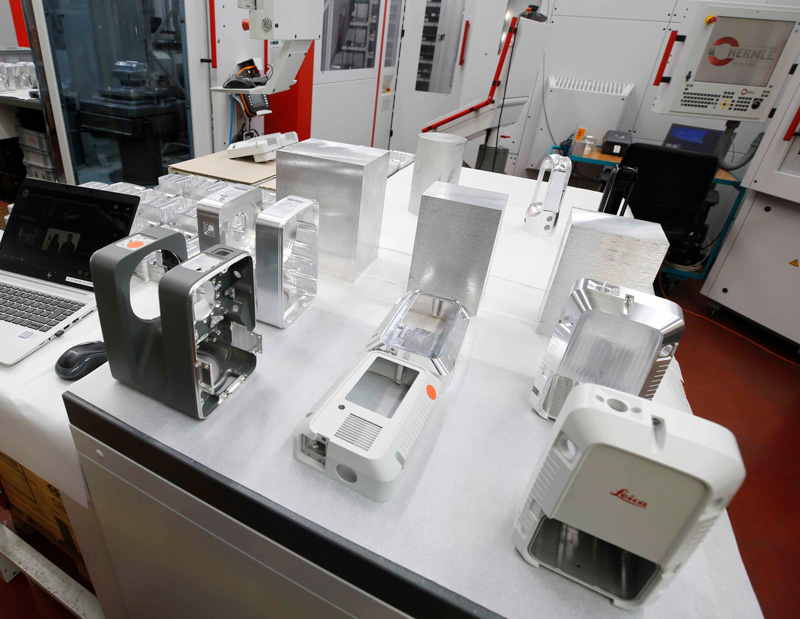
In the Polymecha section of the factory, solid blocks of material are machined into familiar instruments.
Zutter gave an example: “Consider some of the horizontal and vertical axles produced here. They are machined and polished to fit one into the other; we have a male the female parts down to a micrometre [micron, one-millionth of a meter]. If you remove the axle later during maintenance, and you touch it with your fingers, it won’t go in again. That’s microns, so now you need to have those questions popping up. How is this done? How can it work well in temperature ranges of -20°C to +50°C? I don’t know all the secrets that make this all work, and of course, such things need to be kept secret.”
As noted earlier, Wild and Leica Geosystems needed to establish their own, onsite manufacturing capacity, machining, glassworks, electronics, and more. However, more recently the company has spun off some of these as separate business units. While they serve mostly Leica Geosystems, they can also take on work for other customers. Polymeca, a Leica Geosystems AG business unit, provides precision machining, coatings, and assemblies.
“You can see what they do here,” says Zutter, bringing us into a large workshop with numerous automated stations; machining, milling, and grinding out familiar assemblies from solid blocks and cylinders of metal. There are many trays of casings for the alidade units of total stations and housings for various BLK products. “You can bet your last penny that these all have long sheets of specifications.” We were shown a room where short runs are produced, limited runs of specialized and custom instruments and devices. Here is where some of the products for non-Leica Geosystems customers are often produced.
Everything is measured and tested along the way. It is plus that parent company Hexagon also has an industrial metrology company. It becomes a matter of how you measure the measuring devices. Imagine an as-built survey but to the micron. This complement of precision technologies is perfect for such ventures. Another combined manufacturing and metrology facility that comes to mind is the Nikon facility in Zao Japan (which I found impressive on a tour there), though the Heerbrugg facility seems freshly updated. Parts of Polymeca looked a lot like the rooms where they assemble space probes at JPL-Nasa.
It seems everyone in the Polymeca buildings is carrying a measuring device, or there is a metrology device at each station, such as a large stone table with a measuring collar. There are often several machining passes, to get the basic shape from the solid metal blocks and cylinders (some as heavy as 40 kilograms) to finer milling and polishing. Zutter says large components are called “casts”, and that none of the index machines fully completes a cast, there are always further steps like making the edges flat, and adding the holes for bolts, etc. “Do you see what’s happening in there?” said Zutter. “They’re producing the gadgets using the type of magic that makes a block of metal go in there and it comes out like that—such advances over the past 30 years! [For example] there’s a single wizard for placing certain sections; an arm grabbing a piece to be transformed by multiple steps—see, that is beginning to look like an RTC360.”

There are metrology stations at every step in the machining process. Here, a robotic metrology device uses a probe to as-built each manfactured casing, down to microns.
Mill, measure, grind, measure, polish, measure… Rooms are ventilated and filtered, there are sealed enclosures for some steps; it is all so much more complex when you are working down to a micron. Next, during assembly steps, you must contend not only with keeping the mechanical components free of dust and blemishes, but electronic and optical components require a whole new level of care.
The focus on meeting environmental requirements is very high. And not always just because it is required; the company is committed to sustainability goals for not only the factory but as a major manufacturing concern in the region as well. In addition to machining, Polymeca provides surfacing services. Anodizing, plating, painting, electroplating, and more. The process and environmental controls are quite strict, we were not allowed to enter those buildings, only look in the windows.
Key optical components have also been manufactured onsite since the earliest days. We passed the buildings of the present onsite optics source. While the operations of SwissOptic AG (on the Heerbrugg campus) are focused (no pun intended) on optical components for Leica Geosystems, the company has a larger scope. SwissOptic AG is part of a global technology group Jenoptik, that serves a broad photonics market; with high-precision, customer-specific applications.
Geomatics and Reality Capture
As noted, the factory is not only producing traditional surveying instruments but also those for reality capture. You can see MS60 Multistations and TS16 total stations being assembled on the same factory floor as a BLK2GO, etc. Reality capture might get a lot of buzz, but there has been no slowing down for what is now called the Geomatics division.
“There can be challenges to bring new technologies to a company,” said Moritz Lauwiner, president of the Geomatics division. “For GPS it was not difficult to integrate, and for a short while scanning, but later, scanning got such a dynamic that it was felt we needed to give dedicated structure to it. A lot is going on, democratizing the point cloud [etc]. In 2019, it became a dedicated division: Reality Capture.”
Geomatics continues to evolve, with first-of-its-kind innovations like the AP20 tilting prism pole. “I remember when people thought GPS would be the death of total stations, and then the same about scanners,” said Lauwiner. “Total stations remain a highly versatile tool, like for layout and stakeout. Each tool has strengths and weaknesses. And we speak about the surveyors, they are in this super perfect position to be the top qualified professional who can make those trade-offs.”
During the tour, I interviewed the president of the relatively new Reality Capture division, Juergen Mayer (also a surveyor). “Leica Geosystems still strongly focuses on surveyors as a primary customer persona,” said Mayer. “They represent highly skilled users. However, RC technology can and is being leveraged by a growing group of other users, for many more applications.”
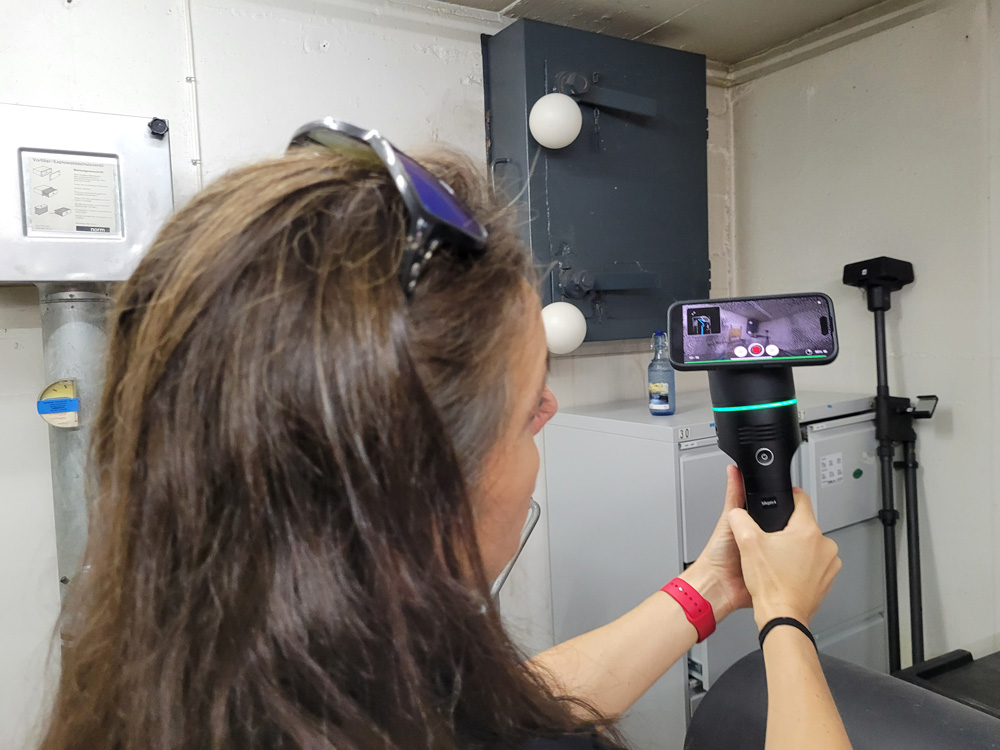
While at the factory, I had an opportunity to test drive the new BLK2GO Pulse, which features solid state SLAM sensors. Here, Vanda Kadlecikova, product engineer in the Reality Capture division of Leica Geosystems, demonstrates the BLK2GO Pulse in a test circuit in one of the basements of the facility.
A question that came up during the chat with Lauwiner was about the reputation their total stations have (among many users) for being the best at passive tracking. Not expecting any trade secrets to be revealed, Lauwiner gave a great explanation:
“We’ve been doing this for 30 years, whereas some manufacturers are new to the game. Of course, you could always use an active target, but the Champions League is reliable passive tracking. Because, if I take an LED signal or an aid signal or any additional energy, then as a user is the hassle of extra components and charging them.
“We call it self-learning, in the sense that it adapts whether the prism is far away, small, large, or that the energy is low, because of rain, etc. Machine learning has been used for some time now. The quality of every component plays a part. From the surface treatment coatings that are optimized for wavelengths, etc. The approach has evolved; for instance, we do not do the old quadrants thing that was once state of the art.
“In the end, I want to have this perfect circle of light coming back on my CMOS camera. Going to get the centre of gravity in my computation, this is xyz in this pixel area, and then we tell the motor to bring this into the centre, you need to turn this much. But of course, the image is changing. It is a loop, and this loop must be tightly coupled and instantaneous. So that means for super locking you also need to invest in the electronics.
“We have had to master superfast communication to keep that coupling tight. After that, what else can we do? No shortcuts. Not only does the camera of the automatic target recognition (ATR) see the image of the prism, but it can also see cars, vests, windows, etc. The big challenge for the software is how to distinguish the image of a prism from everything else and decide which one is the correct one. By refining all the steps I mentioned, we have been able to do this quite well.”
Assembly and Testing
I was warned about two key things on the tour: do not take photos without permission (of course) and do not cross yellow lines. The latter is for proximity safety, but also electrostatics. Certain workstations have specific steps posted to dissipate the type of static electricity we generate just from walking around, the rustle of clothing, etc. “You stand on these two plates down here, and touch this plate up here,” said Zutter. “Many years ago, we had a few instances of instruments being dead on arrival (DOA) due to electrostatic inflicted damage. When touching the plate, a green light must appear. Otherwise, the employee must change their clothes, or wear a grounding strip.”
The products of both the new Reality Capture division (terrestrial laser scanning, mobile mapping systems and BLK lines) and geomatics (surveying instruments) are manufactured, assembled, and tested in the same facilities. The casts and housings for both lines of products are being machined in the Polymeca buildings, many of the optics for both come from the SwissOptic buildings next door.
In the same room as I remember seeing total stations (TS) assembled when I last visited a decade ago, I saw TS and various BLK devices being assembled and tested. Across from a rotating table where a skilled technician is working on MS60s, is a station with a robotic arm putting a BLK2GO through a calibration process.
The assembly technicians undergo lengthy training regimens and probation periods, and there are thick assembly manuals for each product. The instructions are so detailed as to prescribe just how many times to turn the driver for each screw. Tighten too much or too little, and that can introduce stresses and biases to the precision components.

While there is a high degree of automation for certain steps in the process, skilled technicians test and assmble the instuments. Assembly manuals will even prescribe a specific number of turns for each screw, to avoid introducing stress in components.
At one end of the floor are the environmental test chambers, used to check performance under temperature extremes, which can range from -50ºC to +50ºC depending on the instrument. You see large stone tables everywhere, to provide stable platforms to calibrate and test vertical and horizontal motions and compensators. There are shake tables to test performance under various vibration conditions.
Test targets are set up all around the assembly floor, and a substantial part of the basement is dedicated to testing. There is a 60-meter track that runs the length of the basement where, as Zutter explains, an instrument is placed at one end and a carriage with a prism, or prisms is moved. “The tracks are set on 10 solid pillars, as independent as possible. So, for instance, it would not vibrate much when a 40-ton truck rumbles by. The instrument measurements are compared to light wave interferometry; very precise.”
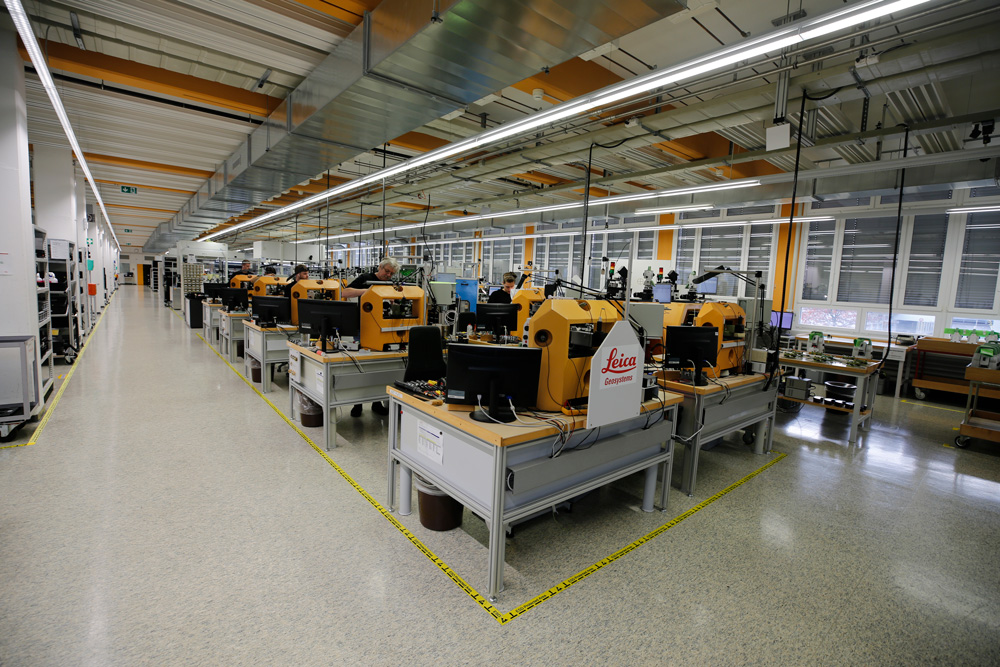
One of the mian assembly floors, where geomatics insturments like total stations, and reality capture devices are assembled, calibrated and tested.
A new addition since my previous visit is a fascinating device for calibrating scanners. It can cater to eight scanners at a time on a carousel. The robot grabs each machine individually brings it forward to a large granite slab, and then it does the geometric integration for the horizontal and vertical angle. There is also a big optical loop, where laser measurements complete the loop from the beginning to the end. “The temperature gets varied from -20°C to +40°C,” explained Zutter. “It does this several times because you’re not going to get the same answer when you change the temperature, as you need a constant for each temperature range. There are three thermometers in the machine and the software is querying this all the time.”
Nearby is a “Kipptisch”, German for tilting table. Used for various instruments, it is also used for metrology laser tracker systems. “It teaches the instruments what is zero (degrees), what is minus 10, what is plus 10, etc …” said Zutter. Like this, is a station for teaching cameras. “There are target tiles with various shapes, where the cameras are taught how to recognize the tiles at various angles.”
There are other highly specialized testing devices, for instance, ones that Leica Geosystems had to design and manufacture themselves to meet federal collimation standards. Several of these test instruments are precise to one-sixth of a second. Speaking of standards, not only do they meet ISO standards, but there are specific Swiss engineering and manufacturing standards. There is even a small office in the corner of the floor for use by the federal inspectors. It is Switzerland after all…
While certain elements of large airborne mapping systems are manufactured elsewhere, some are produced in Heerbrugg, as well as the BLK2FLY. After assembly, these GrandSLAM sensor fusion laser scanners are taken to a test flight area nearby to capture data that is used to complete the calibration process.
Also produced in the same facility are Laser Trackers for Hexagon Metrology. Think of a tracker system as being an (extremely precise) total station, with a super smart handheld “probe” unit. Such systems are used for industrial metrology; essentially doing as-builts of machined and fabricated products and parts. Like auto bodies, aircraft assemblies, machinery, etc. The handheld unit is an active device with multiple laser targets that the station follows and resolves the position in 3D space and orientation of the probes used to measure the surface of the subject part or assemblies. Super high precision, over short distances. The point is that if this same facility can produce such high-precision devices, it gives an idea of what it can do for TS and BLK products.
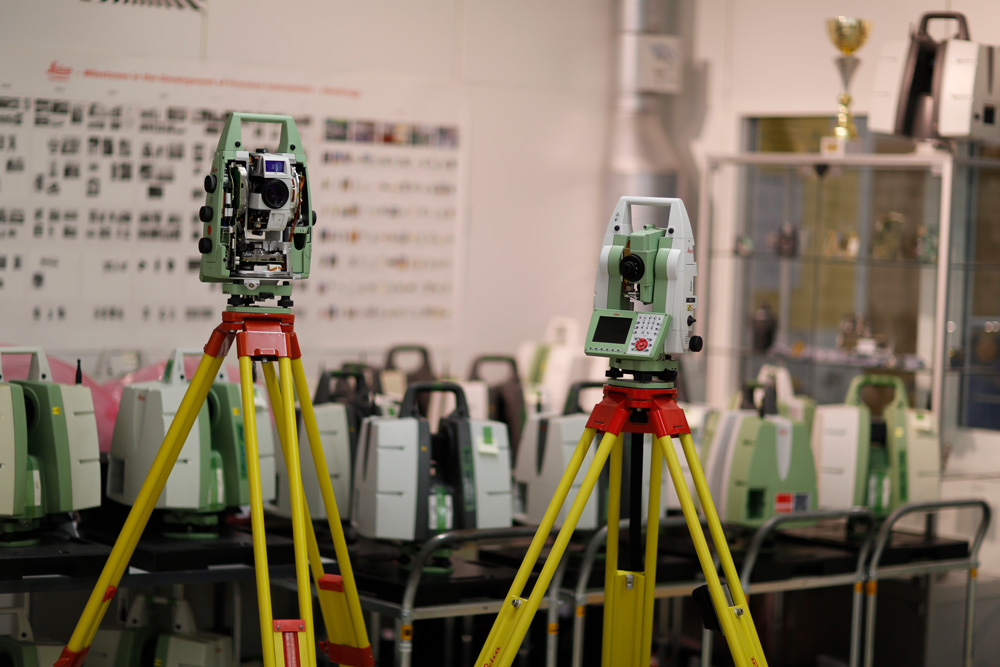
The basement under the main assembly floor is dedicated to testing. There is an interferometry track (to test the lasers) running the length of the floor, and specialized instruemnts that Leica manufactrured, for instance, for collimation testing.
Support and Service
“It’s a never-ending effort in making sure that the people who support our customers are up to the top level,” said Zutter, as we entered a training facility in their central services building. “Having such a high innovation rate, it can be a struggle to keep our support networks up to date with every latest development. We must keep in close contact with our dealers and regional support folks. They cannot know everything always at the same rate. And we try to mitigate it by developing more and more central online learning.”
“This department teaches people how to fix things, and this group also writes the manuals,” said Zutter. Depending on the volume of equipment a dealer intends to service, one of these monuments (pedestals) with all the fixtures for a certain instrument model will be purchased for installation in their country”. Zutter showed us service/calibration pedestals set up around the classrooms.
“Training is demanding,” said Zutter. “Sometimes we get a student that can work well with ‘both hands’, but if we have one that has two left hands, they go home without a diploma. The dealer pays for everything, the flight, training, the hotel, the whole lot. The diploma is very valuable for the dealer and Leica Geosystems clients. Local servicing saves time, avoiding having to ship an instrument back to Switzerland for whatever reason. And every three years we have auditing; many technicians come back here for further training. There are also surprise visits at the dealer’s facility: ‘Hi, remember us? How are you operating? Why is this floor not clean? Where are your tools and why are they not in top shape?” We must maintain a high quality for services all over the world. Currently, there are about 700 certified technicians worldwide.”.
There were two classrooms, where each student had their own pedestal, with highly enviable tool sets, and an instructor moving around between them. The goal is for each technician to be able to operate independently, so the instructors are throwing many different scenarios at them. If you are a certified technician, in a distant time zone, you should be able to fix just about anything without having to call back to Heerbrugg.
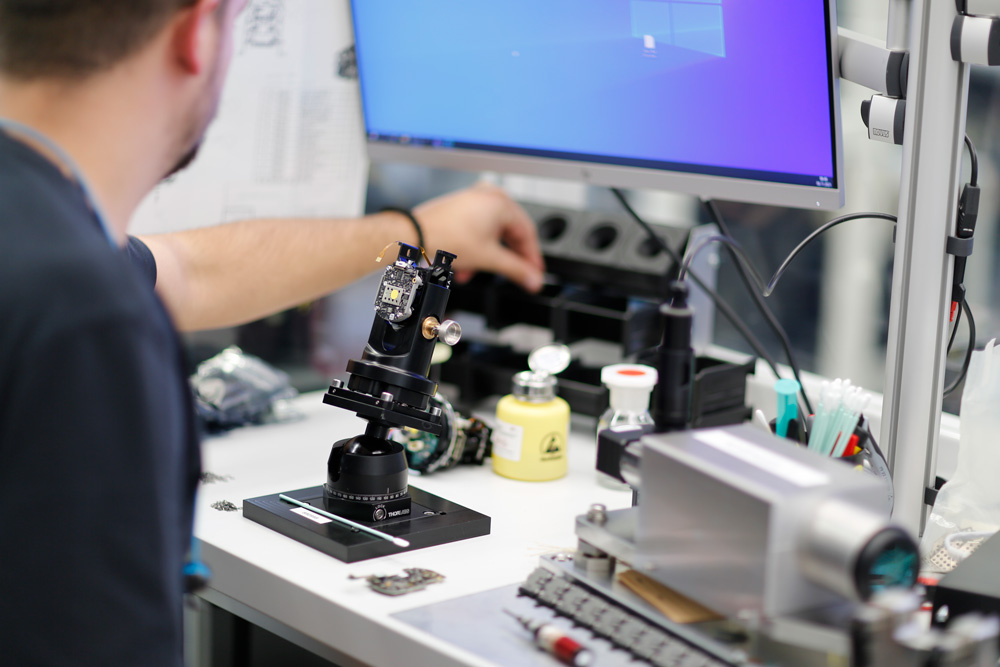
The are about 700 factory trained service technicians worldwide. The training is demanding, and there are receritifcations and suprise site visits to ensure local service centers are meeting strict standards.
There is an extensive global network for support and service, with many of these functions guided by central services at Heerbrugg. “We take care of the business side in regard to after-sales, training, support and service aspects regarding our products,” said Valentin Fuchs, director of reality capture services for Leica Geosystems. “In addition, as part of reality capture services, as there are continuous evolution and innovation, we investigate new business models in coordination with our hardware and software teams. So, with the role, we take care of the after-market business and support in new business models.”
“For the after-market side, to help our customers we have our professional support channels,” said Fuchs. “The first line for support is on a regional level via our dealers or direct sales teams, second support line is on a global level and third level sits within the product management team. The goal is for sure to train and build up knowledge as close to the customer for faster communication. then we have a regional level, and of course, it might get elevated here. Service is similar depending on the product; first contacts from users are dealers or our Leica Geosystems sales and support organisation, who have factory-trained technicians depending on the region and instrument type. If an instrument needs a check or repair, we have a local point of contact. The instrument will either be taken care of locally or sent to a central service location. The training we provide for the dealer and regional technicians means allows them to service local repair requests, again depending on the instrument type.”
“Our online resources for users have expanded rapidly”, said Fuchs. “What we offer within our myWorld account is the myTraining section where we have official videos and tutorials; Leica Geosystems has certified videos in place. It is like a single source, but there are other growing resources: our YouTube channels have tutorials, much like our official videos. As things evolve so rapidly, such outlets enable us, and our dealer and user communities, to post timely content. Feedback and contributions from our user community means we have a community of people helping customers, who are in turn, helping other customers.”
I saw, in every aspect of the tour, this paradigm of the dual geomatics and reality capture lines of business. Support is not the only area where Leica Geosystems has adapted and expanded, but also in the engineering of hardware and software. The impetus for this is the expansion of RC, that has brought in a much more diverse user base.
“There are the measurement professionals, who include expertise in the technical aspects and the professional aspects, like surveyors. They want or need to be able to control every aspect of the process,” said Juergen Mayer, president of the RC division. “And then there’s the people who are simply interested in a deliverable. And they would only care a little about how it is being processed. We call this second group the domain experts; they know their end-use discipline very well and simply want the data to do their work. Think of archaeologists, architects, film crews, etc. All groups do essential work, and there are very specific situations where that work might be appropriate for one group to do rather than the other. Or a team of both.”
For the first group, surveyors, for instance, access to an advanced complement of tools and settings is essential. For the second group, making workflows as automated as possible, without reducing the process to blind button pushing is the challenge. Yet it appears that Leica Geosystems has been able to walk this fine line.
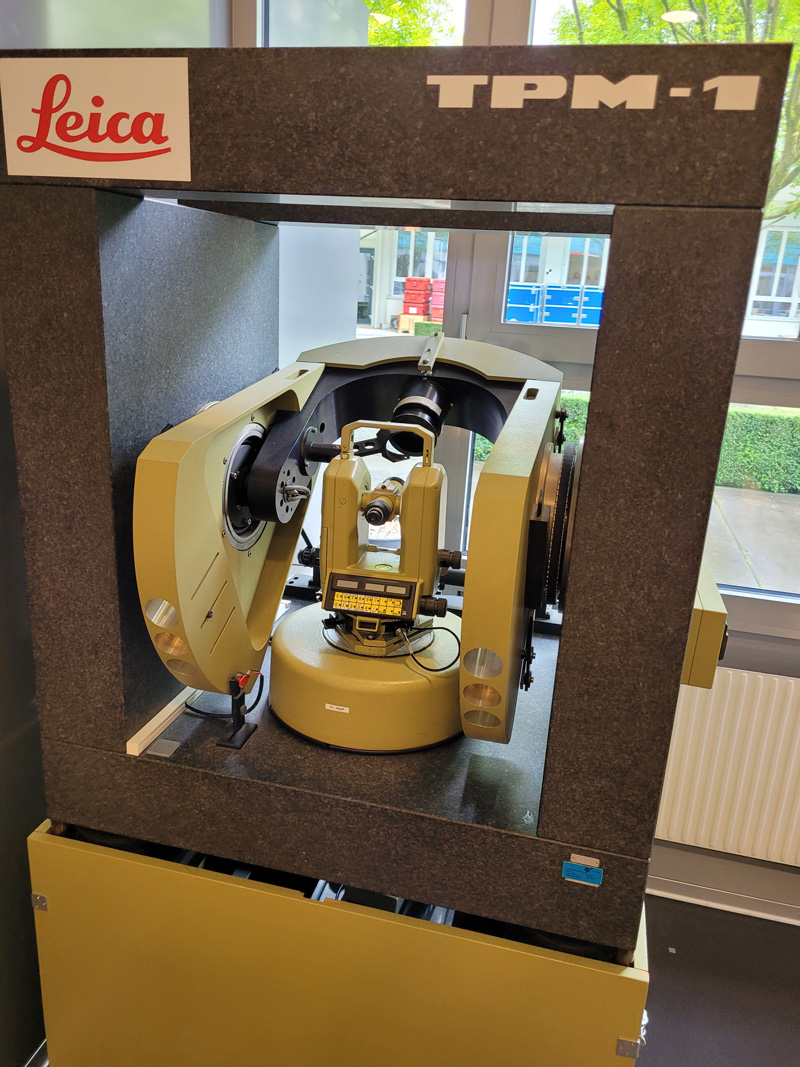
An example of testing and calibration instruments Leica has manufacturerd, shown here in the Centennial Exhibit.
The Centennial Exhibition
Then a cool treat; a tour of the centennial exhibition at the factory, but you can also tour virtually. In 2021, Leica Geosystems celebrated 100 years of manufacturing and innovations. Unfortunately, the centennial was during the pandemic, so most visitors have toured the exhibit in more recent years. Unrelated: the exhibit hall is next to one of the excellent factory cafeterias.
As a surveyor (and geek), I of course found the various famed instruments like the T2 theodolite and its many cousins to be a highlight. But also, this made me feel a bit old as I remember using many of these. However, what was most interesting was the other elements of the exhibit. There were instruments for astronomic observations, satellite components, public safety, construction, progressive innovation in GPS/GNSS, laser scanning, and more. There were several examples of specialized instruments that were designed and used (sometimes to this day) to calibrate other instruments. One exhibit truly epitomized the revolution that Wild had fostered: one of his compact theodolites, juxtaposed with a huge legacy instrument.
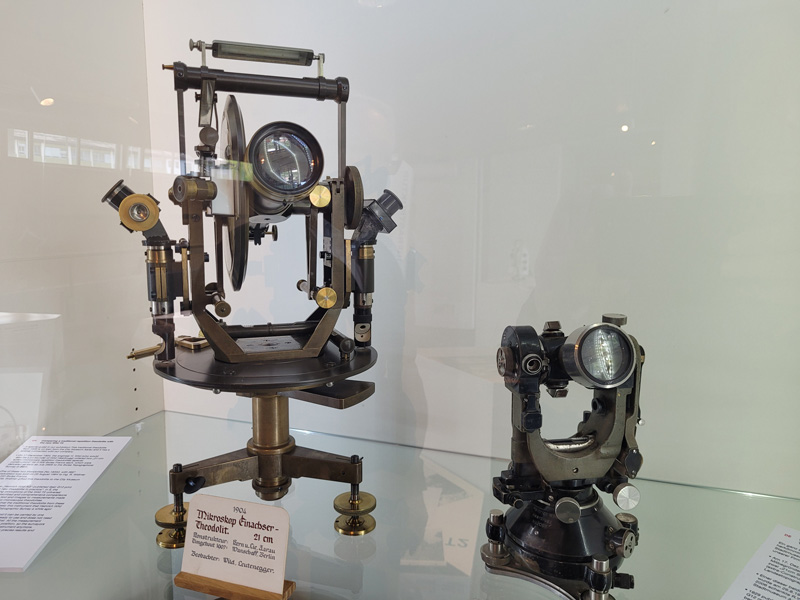
At the beginning of the 20th centrury, instruments were large and heavy (left); contrast this with the modern theodolites Wild began producing in 1921 (right).
That is the story of this factory, from its ambitious origins to the present day: make instruments and solutions progressively smaller, lighter, more precise, more versatile, more reliable, and easier to use. I have toured about a dozen various factories that produce these kinds of instruments. All were marvels of electro-mechanical-optical manufacturing, but I find this one to be even more impressive each time I walk its floors.

The tour was followed by a day with several product managers, taking some of the instruments for test drives (I’ll write those up seperately). The TRK mobile mappings system (left) and the RTC360 (right).

